Bosses: Difference between revisions
No edit summary |
|||
| Line 33: | Line 33: | ||
|align="center"| [[File:Wooden Shoes.png|link=]] [[File:Lucent Grey Powershard.png|link=]] 3x[[File:Green_Magic.png|link=]] | |align="center"| [[File:Wooden Shoes.png|link=]] [[File:Lucent Grey Powershard.png|link=]] 3x[[File:Green_Magic.png|link=]] | ||
|} | |} | ||
{{top}} | |||
=== Map 2 === | === Map 2 === | ||
| Line 67: | Line 68: | ||
|align="center"| [[File:Full Moon Sword.png|link=]] [[File:Golden Key.png|link=]] [[File:Elixier des Forschers.png|link=]] [[File:Lucent Grey Powershard.png|link=]] | |align="center"| [[File:Full Moon Sword.png|link=]] [[File:Golden Key.png|link=]] [[File:Elixier des Forschers.png|link=]] [[File:Lucent Grey Powershard.png|link=]] | ||
|} | |} | ||
{{top}} | |||
=== Ape Dungeon === | === Ape Dungeon === | ||
| Line 91: | Line 93: | ||
|align="center"| [[File:Herb of Expert Monkeys.png|link=]] [[File:Pet_Book_Chest.png|link=]] [[File:Lucent Green Powershard.png|link=]] [[File:Horse Medal.png|link=]] [[File:Seelenstein.png|link=]] [[File:Elixier des Forschers.png|link=]] [[File:Monkey_Egg.png|link=]] [[File:Young Pet Book.png|link=]] [[File:Wild Pet Book.png|link=]] | |align="center"| [[File:Herb of Expert Monkeys.png|link=]] [[File:Pet_Book_Chest.png|link=]] [[File:Lucent Green Powershard.png|link=]] [[File:Horse Medal.png|link=]] [[File:Seelenstein.png|link=]] [[File:Elixier des Forschers.png|link=]] [[File:Monkey_Egg.png|link=]] [[File:Young Pet Book.png|link=]] [[File:Wild Pet Book.png|link=]] | ||
|} | |} | ||
{{top}} | |||
=== Valley of Seungryong === | === Valley of Seungryong === | ||
| Line 105: | Line 108: | ||
|align="center"| [[File:Seelenstein.png|link=]] [[File:Elixier des Forschers.png|link=]] 3x[[File:Muschel.png|link=]] [[File:Segenskugel.png|link=]] 3x[[File:Gegenstand verzaubern.png|link=]] [[File:Lucent Grey Powershard.png|link=]] [[File:Cor Draconis (Roh).png|link=]] [[File:Erfahrungsring.png|link=]] 2x[[File:Feines Tuch.png|link=]] [[File:Bosstruhe.png|link=[[Chief Orc's Box]]]] | |align="center"| [[File:Seelenstein.png|link=]] [[File:Elixier des Forschers.png|link=]] 3x[[File:Muschel.png|link=]] [[File:Segenskugel.png|link=]] 3x[[File:Gegenstand verzaubern.png|link=]] [[File:Lucent Grey Powershard.png|link=]] [[File:Cor Draconis (Roh).png|link=]] [[File:Erfahrungsring.png|link=]] 2x[[File:Feines Tuch.png|link=]] [[File:Bosstruhe.png|link=[[Chief Orc's Box]]]] | ||
|} | |} | ||
{{top}} | |||
=== Yongbi Desert === | === Yongbi Desert === | ||
| Line 119: | Line 123: | ||
|align="center"| [[File:Seelenstein.png|link=]] [[File:Elixier des Forschers.png|link=]] [[File:Lucent Grey Powershard.png|link=]] [[File:Bosstruhe.png|link=[[Desert Tortoise Chest]]]] | |align="center"| [[File:Seelenstein.png|link=]] [[File:Elixier des Forschers.png|link=]] [[File:Lucent Grey Powershard.png|link=]] [[File:Bosstruhe.png|link=[[Desert Tortoise Chest]]]] | ||
|} | |} | ||
{{top}} | |||
=== Hwang-Temple === | === Hwang-Temple === | ||
| Line 138: | Line 143: | ||
|align="center"| [[File:Seelenstein.png|link=]] [[File:Elixier des Forschers.png|link=]] 3x[[File:Muschel.png|link=]] [[File:Segenskugel.png|link=]] 3x[[File:Gegenstand verzaubern.png|link=]] [[File:Lucent Green Powershard.png|link=]] [[File:Cor Draconis (Roh).png|link=]] [[File:Erfahrungsring.png|link=]] 2x[[File:Feines Tuch.png|link=]] [[File:Bosstruhe.png|link=[[Yellow Tiger's Chest]]]] | |align="center"| [[File:Seelenstein.png|link=]] [[File:Elixier des Forschers.png|link=]] 3x[[File:Muschel.png|link=]] [[File:Segenskugel.png|link=]] 3x[[File:Gegenstand verzaubern.png|link=]] [[File:Lucent Green Powershard.png|link=]] [[File:Cor Draconis (Roh).png|link=]] [[File:Erfahrungsring.png|link=]] 2x[[File:Feines Tuch.png|link=]] [[File:Bosstruhe.png|link=[[Yellow Tiger's Chest]]]] | ||
|} | |} | ||
{{top}} | |||
=== Spider Dungeon 1 === | === Spider Dungeon 1 === | ||
| Line 152: | Line 158: | ||
|align="center"| [[File:Seelenstein.png|link=]] [[File:Elixier des Forschers.png|link=]] [[File:Passage Ticket.png|link=]] 3x[[File:Muschel.png|link=]] [[File:Segenskugel.png|link=]] 3x[[File:Gegenstand verzaubern.png|link=]] [[File:Lucent Green Powershard.png|link=]] [[File:Cor Draconis (Roh).png|link=]] [[File:Erfahrungsring.png|link=]] 2x[[File:Feines Tuch.png|link=]] [[File:Bosstruhe.png|link=[[Queen Spider Box]]]] [[File:Queen Spider Poison.png|link=]] | |align="center"| [[File:Seelenstein.png|link=]] [[File:Elixier des Forschers.png|link=]] [[File:Passage Ticket.png|link=]] 3x[[File:Muschel.png|link=]] [[File:Segenskugel.png|link=]] 3x[[File:Gegenstand verzaubern.png|link=]] [[File:Lucent Green Powershard.png|link=]] [[File:Cor Draconis (Roh).png|link=]] [[File:Erfahrungsring.png|link=]] 2x[[File:Feines Tuch.png|link=]] [[File:Bosstruhe.png|link=[[Queen Spider Box]]]] [[File:Queen Spider Poison.png|link=]] | ||
|} | |} | ||
{{top}} | |||
=== Spider Dungeon 2 === | === Spider Dungeon 2 === | ||
| Line 166: | Line 173: | ||
|align="center"| [[File:Seelenstein.png|link=]] [[File:Elixier des Forschers.png|link=]] [[File:Passage Ticket.png|link=]] 3x[[File:Muschel.png|link=]] [[File:Segenskugel.png|link=]] 3x[[File:Gegenstand verzaubern.png|link=]] [[File:Lucent Green Powershard.png|link=]] [[File:Cor Draconis (Roh).png|link=]] [[File:Erfahrungsring.png|link=]] 2x[[File:Feines Tuch.png|link=]] [[File:Bosstruhe.png|link=[[Queen Spider Box]]]] [[File:Queen Spider Poison.png|link=]] | |align="center"| [[File:Seelenstein.png|link=]] [[File:Elixier des Forschers.png|link=]] [[File:Passage Ticket.png|link=]] 3x[[File:Muschel.png|link=]] [[File:Segenskugel.png|link=]] 3x[[File:Gegenstand verzaubern.png|link=]] [[File:Lucent Green Powershard.png|link=]] [[File:Cor Draconis (Roh).png|link=]] [[File:Erfahrungsring.png|link=]] 2x[[File:Feines Tuch.png|link=]] [[File:Bosstruhe.png|link=[[Queen Spider Box]]]] [[File:Queen Spider Poison.png|link=]] | ||
|} | |} | ||
{{top}} | |||
=== Mount Sohan === | === Mount Sohan === | ||
| Line 180: | Line 188: | ||
|align="center"| [[File:Blood Stone.png|link=]] [[File:Seelenstein.png|link=]] [[File:Elixier des Forschers.png|link=]] 3x[[File:Muschel.png|link=]] [[File:Segenskugel.png|link=]] 3x[[File:Gegenstand verzaubern.png|link=]] [[File:Lucent Green Powershard.png|link=]] [[File:Cor Draconis (Roh).png|link=]] [[File:Erfahrungsring.png|link=]] 2x[[File:Feines Tuch.png|link=]] [[File:Bosstruhe.png|link=[[Nine Tails Chest]]]] | |align="center"| [[File:Blood Stone.png|link=]] [[File:Seelenstein.png|link=]] [[File:Elixier des Forschers.png|link=]] 3x[[File:Muschel.png|link=]] [[File:Segenskugel.png|link=]] 3x[[File:Gegenstand verzaubern.png|link=]] [[File:Lucent Green Powershard.png|link=]] [[File:Cor Draconis (Roh).png|link=]] [[File:Erfahrungsring.png|link=]] 2x[[File:Feines Tuch.png|link=]] [[File:Bosstruhe.png|link=[[Nine Tails Chest]]]] | ||
|} | |} | ||
{{top}} | |||
=== Doyyumhwan === | === Doyyumhwan === | ||
| Line 194: | Line 203: | ||
|align="center"| [[File:Seelenstein.png|link=]] [[File:Elixier des Forschers.png|link=]] 3x[[File:Muschel.png|link=]] [[File:Segenskugel.png|link=]] 3x[[File:Gegenstand verzaubern.png|link=]] [[File:Lucent Green Powershard.png|link=]] [[File:Cor Draconis (Roh).png|link=]] [[File:Erfahrungsring.png|link=]] 2x[[File:Feines Tuch.png|link=]] [[File:Bosstruhe.png|link=[[Flame King's Chest]]]] | |align="center"| [[File:Seelenstein.png|link=]] [[File:Elixier des Forschers.png|link=]] 3x[[File:Muschel.png|link=]] [[File:Segenskugel.png|link=]] 3x[[File:Gegenstand verzaubern.png|link=]] [[File:Lucent Green Powershard.png|link=]] [[File:Cor Draconis (Roh).png|link=]] [[File:Erfahrungsring.png|link=]] 2x[[File:Feines Tuch.png|link=]] [[File:Bosstruhe.png|link=[[Flame King's Chest]]]] | ||
|} | |} | ||
{{top}} | |||
=== Grotto of Exile 1 === | === Grotto of Exile 1 === | ||
| Line 208: | Line 218: | ||
|align="center"| [[File:Blacksteel.gif|link=]]+7 [[File:Shields.gif|link=]]+5 [[File:Shoes.gif|link=]]+6 [[File:Necklace.gif|link=]]+6 [[File:Earrings.gif|link=]]+6 [[File:Stone.gif|link=]]+4 [[File:Blood Stone.png|link=]] [[File:Seelenstein.png|link=]] [[File:Glove Piece.png|link=]] [[File:Lucent Green Powershard.png|link=]] | |align="center"| [[File:Blacksteel.gif|link=]]+7 [[File:Shields.gif|link=]]+5 [[File:Shoes.gif|link=]]+6 [[File:Necklace.gif|link=]]+6 [[File:Earrings.gif|link=]]+6 [[File:Stone.gif|link=]]+4 [[File:Blood Stone.png|link=]] [[File:Seelenstein.png|link=]] [[File:Glove Piece.png|link=]] [[File:Lucent Green Powershard.png|link=]] | ||
|} | |} | ||
{{top}} | |||
=== Grotto of Exile 2 === | === Grotto of Exile 2 === | ||
| Line 222: | Line 233: | ||
|align="center"| [[File:Blacksteel.gif|link=]]+2 [[File:Shields.gif|link=]]+5 [[File:Shoes 2.gif|link=]]+5 [[File:Necklace 2.gif|link=]]+6 [[File:Earrings 2.gif|link=]]+6 2x[[File:Muschel.png|link=]] 3x[[File:Twisted Key.png|link=]] [[File:Seelenstein.png|link=]] [[File:Lucent Green Powershard.png|link=]] | |align="center"| [[File:Blacksteel.gif|link=]]+2 [[File:Shields.gif|link=]]+5 [[File:Shoes 2.gif|link=]]+5 [[File:Necklace 2.gif|link=]]+6 [[File:Earrings 2.gif|link=]]+6 2x[[File:Muschel.png|link=]] 3x[[File:Twisted Key.png|link=]] [[File:Seelenstein.png|link=]] [[File:Lucent Green Powershard.png|link=]] | ||
|} | |} | ||
{{top}} | |||
=== Cape Dragon Fire === | === Cape Dragon Fire === | ||
| Line 256: | Line 268: | ||
|align="center"| [[File:Blacksteel.gif|link=]]+5 [[File:Seelenstein.png|link=]] [[File:Tue Fungus.png|link=]] [[File:Elixier des Forschers.png|link=]] [[File:Ring Piece.png|link=]] [[File:Glove Piece.png|link=]] [[File:Bosstruhe.png|link=[[Chest of Darkness]]]] [[File:Rainbow Powershard.png|link=]] [[File:Lucent Yellow Powershard.png|link=]] [[File:Cor Draconis (Roh).png|link=]] [[File:Feines Tuch.png|link=]] | |align="center"| [[File:Blacksteel.gif|link=]]+5 [[File:Seelenstein.png|link=]] [[File:Tue Fungus.png|link=]] [[File:Elixier des Forschers.png|link=]] [[File:Ring Piece.png|link=]] [[File:Glove Piece.png|link=]] [[File:Bosstruhe.png|link=[[Chest of Darkness]]]] [[File:Rainbow Powershard.png|link=]] [[File:Lucent Yellow Powershard.png|link=]] [[File:Cor Draconis (Roh).png|link=]] [[File:Feines Tuch.png|link=]] | ||
|} | |} | ||
{{top}} | |||
=== Nephrite Bay === | === Nephrite Bay === | ||
| Line 295: | Line 308: | ||
|align="center"| [[File:Blacksteel.gif|link=]]+5 [[File:Seelenstein.png|link=]] [[File:Tue Fungus.png|link=]] [[File:Elixier des Forschers.png|link=]] [[File:Ring Piece.png|link=]] [[File:Glove Piece.png|link=]] [[File:Bosstruhe.png|link=[[Chest of Darkness]]]] [[File:Rainbow Powershard.png|link=]] [[File:Lucent Yellow Powershard.png|link=]] [[File:Cor Draconis (Roh).png|link=]] [[File:Feines Tuch.png|link=]] | |align="center"| [[File:Blacksteel.gif|link=]]+5 [[File:Seelenstein.png|link=]] [[File:Tue Fungus.png|link=]] [[File:Elixier des Forschers.png|link=]] [[File:Ring Piece.png|link=]] [[File:Glove Piece.png|link=]] [[File:Bosstruhe.png|link=[[Chest of Darkness]]]] [[File:Rainbow Powershard.png|link=]] [[File:Lucent Yellow Powershard.png|link=]] [[File:Cor Draconis (Roh).png|link=]] [[File:Feines Tuch.png|link=]] | ||
|} | |} | ||
{{top}} | |||
=== Thunder Mountains === | === Thunder Mountains === | ||
| Line 334: | Line 348: | ||
|align="center"| [[File:Blacksteel.gif|link=]]+5 [[File:Seelenstein.png|link=]] [[File:Tue Fungus.png|link=]] [[File:Elixier des Forschers.png|link=]] [[File:Ring Piece.png|link=]] [[File:Glove Piece.png|link=]] [[File:Bosstruhe.png|link=[[Chest of Darkness]]]] [[File:Rainbow Powershard.png|link=]] [[File:Lucent Yellow Powershard.png|link=]] [[File:Cor Draconis (Roh).png|link=]] [[File:Feines Tuch.png|link=]] | |align="center"| [[File:Blacksteel.gif|link=]]+5 [[File:Seelenstein.png|link=]] [[File:Tue Fungus.png|link=]] [[File:Elixier des Forschers.png|link=]] [[File:Ring Piece.png|link=]] [[File:Glove Piece.png|link=]] [[File:Bosstruhe.png|link=[[Chest of Darkness]]]] [[File:Rainbow Powershard.png|link=]] [[File:Lucent Yellow Powershard.png|link=]] [[File:Cor Draconis (Roh).png|link=]] [[File:Feines Tuch.png|link=]] | ||
|} | |} | ||
{{top}} | |||
=== Gautamacliff === | === Gautamacliff === | ||
| Line 381: | Line 396: | ||
|align="center"| [[File:Seelenstein.png|link=]] | |align="center"| [[File:Seelenstein.png|link=]] | ||
|} | |} | ||
{{top}} | |||
=== Temple of Ochao === | === Temple of Ochao === | ||
| Line 405: | Line 421: | ||
|align="center"| Opens up a Portal to enter the Enchanted Forest<br>[[File:Portal.png|link=]] | |align="center"| Opens up a Portal to enter the Enchanted Forest<br>[[File:Portal.png|link=]] | ||
|} | |} | ||
{{top}} | |||
== New Continent (Yohara) == | == New Continent (Yohara) == | ||
| Line 430: | Line 447: | ||
|align="center"| [[File:Inspiration of a Rookie.png|link=]] [[File:Inspiration of an Adept.png|link=]] [[File:Inspiration of an Expert.png|link=]] [[File:Charisma of a Rookie.png|link=]] [[File:Charisma of an Adept.png|link=]] [[File:Charisma of an Expert.png|link=]] [[File:Book of Precision.png|link=]] [[File:Red Sung Ma Rune.png|link=]] [[File:Purple Sung Ma Rune.png|link=]] [[File:Blue Sung Ma Rune.png|link=]] [[File:Green Sung Ma Rune.png|link=]] [[File:Leather Hardener.png|link=]] [[File:Leather Hardener+.png|link=]] [[File:9th Path Book Chest.png|link=]] [[File:Bosstruhe.png|link=[[Yohara Treasure Chest]]]] [[File:Will Topaz.png|link=]] [[File:Hard Leather.png|link=]] [[File:Glove Design.png|link=]] [[File:Talent Potion.png|link=]] [[File:Tainted Core.png|link=]] [[File:Random Treasure Chest.png|link=[[Random Treasure Chest]]]] [[File:Frost Root.png|link=]] 3x[[File:Fog Jadite.png|link=]] [[File:Aura Fire Rune (10).png|link=]] [[File:Holy Powershard.png|link=]] [[File:Mysterious Ticket.png|link=]] 200x[[File:Glimmerstone.png|link=]] | |align="center"| [[File:Inspiration of a Rookie.png|link=]] [[File:Inspiration of an Adept.png|link=]] [[File:Inspiration of an Expert.png|link=]] [[File:Charisma of a Rookie.png|link=]] [[File:Charisma of an Adept.png|link=]] [[File:Charisma of an Expert.png|link=]] [[File:Book of Precision.png|link=]] [[File:Red Sung Ma Rune.png|link=]] [[File:Purple Sung Ma Rune.png|link=]] [[File:Blue Sung Ma Rune.png|link=]] [[File:Green Sung Ma Rune.png|link=]] [[File:Leather Hardener.png|link=]] [[File:Leather Hardener+.png|link=]] [[File:9th Path Book Chest.png|link=]] [[File:Bosstruhe.png|link=[[Yohara Treasure Chest]]]] [[File:Will Topaz.png|link=]] [[File:Hard Leather.png|link=]] [[File:Glove Design.png|link=]] [[File:Talent Potion.png|link=]] [[File:Tainted Core.png|link=]] [[File:Random Treasure Chest.png|link=[[Random Treasure Chest]]]] [[File:Frost Root.png|link=]] 3x[[File:Fog Jadite.png|link=]] [[File:Aura Fire Rune (10).png|link=]] [[File:Holy Powershard.png|link=]] [[File:Mysterious Ticket.png|link=]] 200x[[File:Glimmerstone.png|link=]] | ||
|} | |} | ||
{{top}} | |||
=== Dong Gwang Plain === | === Dong Gwang Plain === | ||
| Line 454: | Line 472: | ||
|align="center"| [[File:Inspiration of a Rookie.png|link=]] [[File:Charisma of an Adept.png|link=]] [[File:Book of Precision.png|link=]] [[File:Red Sung Ma Rune.png|link=]] [[File:Purple Sung Ma Rune.png|link=]] [[File:Blue Sung Ma Rune.png|link=]] [[File:Green Sung Ma Rune.png|link=]] [[File:Leather Hardener.png|link=]] [[File:Leather Hardener+.png|link=]] [[File:9th Path Book Chest.png|link=]] [[File:Bosstruhe.png|link=[[Yohara Treasure Chest]]]] [[File:Hard Leather.png|link=]] [[File:Glove Design.png|link=]] [[File:Talent Potion.png|link=]] [[File:Argos Fang.png|link=]] 3x[[File:Sun Jadite.png|link=]] [[File:Random Treasure Chest.png|link=[[Random Treasure Chest]]]] [[File:Flaming Leaf.png|link=]] [[File:Aura Fire Rune (10).png|link=]] [[File:Holy Powershard.png|link=]] [[File:Mysterious Ticket.png|link=]] 200x[[File:Glimmerstone.png|link=]] | |align="center"| [[File:Inspiration of a Rookie.png|link=]] [[File:Charisma of an Adept.png|link=]] [[File:Book of Precision.png|link=]] [[File:Red Sung Ma Rune.png|link=]] [[File:Purple Sung Ma Rune.png|link=]] [[File:Blue Sung Ma Rune.png|link=]] [[File:Green Sung Ma Rune.png|link=]] [[File:Leather Hardener.png|link=]] [[File:Leather Hardener+.png|link=]] [[File:9th Path Book Chest.png|link=]] [[File:Bosstruhe.png|link=[[Yohara Treasure Chest]]]] [[File:Hard Leather.png|link=]] [[File:Glove Design.png|link=]] [[File:Talent Potion.png|link=]] [[File:Argos Fang.png|link=]] 3x[[File:Sun Jadite.png|link=]] [[File:Random Treasure Chest.png|link=[[Random Treasure Chest]]]] [[File:Flaming Leaf.png|link=]] [[File:Aura Fire Rune (10).png|link=]] [[File:Holy Powershard.png|link=]] [[File:Mysterious Ticket.png|link=]] 200x[[File:Glimmerstone.png|link=]] | ||
|} | |} | ||
{{top}} | |||
=== Gnoll Cave Floor 1 === | === Gnoll Cave Floor 1 === | ||
| Line 473: | Line 492: | ||
|align="center"| [[File:Bosstruhe.png|link=[[Labyrinth Chest]]]] [[File:Gnoll Master Chest.png|link=[[Gnoll Master Chest]]]] [[File:Hard Leather.png|link=]] [[File:Glove Design.png|link=]] [[File:Earth Vine.png|link=]] [[File:Aura Fire Rune (10).png|link=]] [[File:Holy Powershard.png|link=]] | |align="center"| [[File:Bosstruhe.png|link=[[Labyrinth Chest]]]] [[File:Gnoll Master Chest.png|link=[[Gnoll Master Chest]]]] [[File:Hard Leather.png|link=]] [[File:Glove Design.png|link=]] [[File:Earth Vine.png|link=]] [[File:Aura Fire Rune (10).png|link=]] [[File:Holy Powershard.png|link=]] | ||
|} | |} | ||
{{top}} | |||
=== Gnoll Cave Floor 2 === | === Gnoll Cave Floor 2 === | ||
| Line 492: | Line 512: | ||
|align="center"| [[File:Red Sung Ma Rune.png|link=]] [[File:Purple Sung Ma Rune.png|link=]] [[File:Blue Sung Ma Rune.png|link=]] [[File:Green Sung Ma Rune.png|link=]] [[File:Ahtrin Master Chest.png|link=[[Ahtrin Master Chest]]]] [[File:Hard Leather.png|link=]] [[File:Glove Design.png|link=]] [[File:Darkthorn.png|link=]] [[File:Aura Fire Rune (10).png|link=]] [[File:Holy Powershard.png|link=]] | |align="center"| [[File:Red Sung Ma Rune.png|link=]] [[File:Purple Sung Ma Rune.png|link=]] [[File:Blue Sung Ma Rune.png|link=]] [[File:Green Sung Ma Rune.png|link=]] [[File:Ahtrin Master Chest.png|link=[[Ahtrin Master Chest]]]] [[File:Hard Leather.png|link=]] [[File:Glove Design.png|link=]] [[File:Darkthorn.png|link=]] [[File:Aura Fire Rune (10).png|link=]] [[File:Holy Powershard.png|link=]] | ||
|} | |} | ||
{{top}} | |||
=== Gnoll Cave Floor 3 === | === Gnoll Cave Floor 3 === | ||
| Line 511: | Line 532: | ||
|align="center"| [[File:Red Sung Ma Rune.png|link=]] [[File:Purple Sung Ma Rune.png|link=]] [[File:Blue Sung Ma Rune.png|link=]] [[File:Green Sung Ma Rune.png|link=]] [[File:Bosstruhe.png|link=[[Labyrinth Chest]]]] [[File:Gold Threaded Chest.png|link=[[Gold Threaded Chest]]]] [[File:Hard Leather.png|link=]] [[File:Glove Design.png|link=]] [[File:Darkthorn.png|link=]] [[File:Aura Fire Rune (10).png|link=]] [[File:Holy Powershard.png|link=]] | |align="center"| [[File:Red Sung Ma Rune.png|link=]] [[File:Purple Sung Ma Rune.png|link=]] [[File:Blue Sung Ma Rune.png|link=]] [[File:Green Sung Ma Rune.png|link=]] [[File:Bosstruhe.png|link=[[Labyrinth Chest]]]] [[File:Gold Threaded Chest.png|link=[[Gold Threaded Chest]]]] [[File:Hard Leather.png|link=]] [[File:Glove Design.png|link=]] [[File:Darkthorn.png|link=]] [[File:Aura Fire Rune (10).png|link=]] [[File:Holy Powershard.png|link=]] | ||
|} | |} | ||
{{top}} | |||
=== Seo Gwang Wastelands === | === Seo Gwang Wastelands === | ||
| Line 527: | Line 549: | ||
Quag Primus<br>[[File:Inspiration of a Rookie.png|link=]] [[File:Inspiration of an Adept.png|link=]] [[File:Inspiration of an Expert.png|link=]] [[File:Charisma of a Rookie.png|link=]] [[File:Charisma of an Adept.png|link=]] [[File:Charisma of an Expert.png|link=]] [[File:Book of Precision.png|link=]] [[File:Red Sung Ma Rune.png|link=]] [[File:Purple Sung Ma Rune.png|link=]] [[File:Blue Sung Ma Rune.png|link=]] [[File:Green Sung Ma Rune.png|link=]] [[File:Leather Hardener.png|link=]] [[File:Leather Hardener+.png|link=]] [[File:9th Path Book Chest.png|link=]] [[File:Bosstruhe.png|link=[[Yohara Treasure Chest]]]] [[File:Hard Leather.png|link=]] [[File:Glove Design.png|link=]] [[File:Talent Potion.png|link=]] [[File:Argos Scale.png|link=]] 3x[[File:Night Jadite.png|link=]] [[File:Random Treasure Chest.png|link=[[Random Treasure Chest]]]] [[File:Earth Vine.png|link=]] [[File:Aura Fire Rune (10).png|link=]] [[File:Holy Powershard.png|link=]] [[File:Mysterious Ticket.png|link=]] 200x[[File:Glimmerstone.png|link=]] | Quag Primus<br>[[File:Inspiration of a Rookie.png|link=]] [[File:Inspiration of an Adept.png|link=]] [[File:Inspiration of an Expert.png|link=]] [[File:Charisma of a Rookie.png|link=]] [[File:Charisma of an Adept.png|link=]] [[File:Charisma of an Expert.png|link=]] [[File:Book of Precision.png|link=]] [[File:Red Sung Ma Rune.png|link=]] [[File:Purple Sung Ma Rune.png|link=]] [[File:Blue Sung Ma Rune.png|link=]] [[File:Green Sung Ma Rune.png|link=]] [[File:Leather Hardener.png|link=]] [[File:Leather Hardener+.png|link=]] [[File:9th Path Book Chest.png|link=]] [[File:Bosstruhe.png|link=[[Yohara Treasure Chest]]]] [[File:Hard Leather.png|link=]] [[File:Glove Design.png|link=]] [[File:Talent Potion.png|link=]] [[File:Argos Scale.png|link=]] 3x[[File:Night Jadite.png|link=]] [[File:Random Treasure Chest.png|link=[[Random Treasure Chest]]]] [[File:Earth Vine.png|link=]] [[File:Aura Fire Rune (10).png|link=]] [[File:Holy Powershard.png|link=]] [[File:Mysterious Ticket.png|link=]] 200x[[File:Glimmerstone.png|link=]] | ||
|} | |} | ||
{{top}} | |||
=== Nam Gwang Chasm === | === Nam Gwang Chasm === | ||
| Line 548: | Line 571: | ||
Quag Primus<br>[[File:Inspiration of a Rookie.png|link=]] [[File:Inspiration of an Adept.png|link=]] [[File:Inspiration of an Expert.png|link=]] [[File:Charisma of a Rookie.png|link=]] [[File:Charisma of an Adept.png|link=]] [[File:Charisma of an Expert.png|link=]] [[File:Book of Precision.png|link=]] [[File:Red Sung Ma Rune.png|link=]] [[File:Purple Sung Ma Rune.png|link=]] [[File:Blue Sung Ma Rune.png|link=]] [[File:Green Sung Ma Rune.png|link=]] [[File:Leather Hardener.png|link=]] [[File:Leather Hardener+.png|link=]] [[File:9th Path Book Chest.png|link=]] [[File:Bosstruhe.png|link=[[Yohara Treasure Chest]]]] [[File:Hard Leather.png|link=]] [[File:Glove Design.png|link=]] [[File:Talent Potion.png|link=]] [[File:Argos Scale.png|link=]] 3x[[File:Night Jadite.png|link=]] [[File:Random Treasure Chest.png|link=[[Random Treasure Chest]]]] [[File:Northwind Blossom.png|link=]] [[File:Aura Fire Rune (10).png|link=]] [[File:Holy Powershard.png|link=]] [[File:Mysterious Ticket.png|link=]] 200x[[File:Glimmerstone.png|link=]] | Quag Primus<br>[[File:Inspiration of a Rookie.png|link=]] [[File:Inspiration of an Adept.png|link=]] [[File:Inspiration of an Expert.png|link=]] [[File:Charisma of a Rookie.png|link=]] [[File:Charisma of an Adept.png|link=]] [[File:Charisma of an Expert.png|link=]] [[File:Book of Precision.png|link=]] [[File:Red Sung Ma Rune.png|link=]] [[File:Purple Sung Ma Rune.png|link=]] [[File:Blue Sung Ma Rune.png|link=]] [[File:Green Sung Ma Rune.png|link=]] [[File:Leather Hardener.png|link=]] [[File:Leather Hardener+.png|link=]] [[File:9th Path Book Chest.png|link=]] [[File:Bosstruhe.png|link=[[Yohara Treasure Chest]]]] [[File:Hard Leather.png|link=]] [[File:Glove Design.png|link=]] [[File:Talent Potion.png|link=]] [[File:Argos Scale.png|link=]] 3x[[File:Night Jadite.png|link=]] [[File:Random Treasure Chest.png|link=[[Random Treasure Chest]]]] [[File:Northwind Blossom.png|link=]] [[File:Aura Fire Rune (10).png|link=]] [[File:Holy Powershard.png|link=]] [[File:Mysterious Ticket.png|link=]] 200x[[File:Glimmerstone.png|link=]] | ||
|} | |} | ||
{{top}} | |||
=== Mysterious Dungeon === | === Mysterious Dungeon === | ||
| Line 562: | Line 586: | ||
|align="center"| [[File:Stone.gif|link=]] [[File:Demon Stone.png|link=]]+4 [[File:Perfect Chest.png|link=[[Perfect Talisman Chest]]]] [[File:Perfect Chest.png|link=[[Perfect Chest]]]] [[File:Perfect Key.png|link=]] 2x[[File:Holy Powershard.png|link=]] [[File:Mysterious Ticket.png|link=]] | |align="center"| [[File:Stone.gif|link=]] [[File:Demon Stone.png|link=]]+4 [[File:Perfect Chest.png|link=[[Perfect Talisman Chest]]]] [[File:Perfect Chest.png|link=[[Perfect Chest]]]] [[File:Perfect Key.png|link=]] 2x[[File:Holy Powershard.png|link=]] [[File:Mysterious Ticket.png|link=]] | ||
|} | |} | ||
{{top}} | |||
=== Yilad Pass === | === Yilad Pass === | ||
| Line 585: | Line 610: | ||
Tainted War Chief (Earth)<br>[[File:Book of Precision.png|link=]] [[File:Will Topaz.png|link=]] [[File:Red Sung Ma Rune.png|link=]] [[File:Purple Sung Ma Rune.png|link=]] [[File:Blue Sung Ma Rune.png|link=]] [[File:Green Sung Ma Rune.png|link=]] [[File:Leather Hardener.png|link=]] [[File:Leather Hardener+.png|link=]] [[File:Serpent Silk.png|link=]] [[File:Serpent Design.png|link=]] [[File:Hard Leather.png|link=]] [[File:Glove Design.png|link=]] [[File:9th Path Book Chest.png|link=]] [[File:Bosstruhe.png|link=[[Yohara Treasure Chest]]]] [[File:Shimmering Seashell.png|link=]] [[File:Serpent Dust.png|link=]] [[File:Talent Potion.png|link=]] [[File:Smoky Jadite.png|link=]] [[File:Random Treasure Chest.png|link=[[Random Treasure Chest]]]] [[File:Earth Vine.png|link=]] [[File:Aura Fire Rune (10).png|link=]] [[File:Holy Powershard.png|link=]] [[File:Mysterious Ticket.png|link=]] 200x[[File:Glimmerstone.png|link=]] | Tainted War Chief (Earth)<br>[[File:Book of Precision.png|link=]] [[File:Will Topaz.png|link=]] [[File:Red Sung Ma Rune.png|link=]] [[File:Purple Sung Ma Rune.png|link=]] [[File:Blue Sung Ma Rune.png|link=]] [[File:Green Sung Ma Rune.png|link=]] [[File:Leather Hardener.png|link=]] [[File:Leather Hardener+.png|link=]] [[File:Serpent Silk.png|link=]] [[File:Serpent Design.png|link=]] [[File:Hard Leather.png|link=]] [[File:Glove Design.png|link=]] [[File:9th Path Book Chest.png|link=]] [[File:Bosstruhe.png|link=[[Yohara Treasure Chest]]]] [[File:Shimmering Seashell.png|link=]] [[File:Serpent Dust.png|link=]] [[File:Talent Potion.png|link=]] [[File:Smoky Jadite.png|link=]] [[File:Random Treasure Chest.png|link=[[Random Treasure Chest]]]] [[File:Earth Vine.png|link=]] [[File:Aura Fire Rune (10).png|link=]] [[File:Holy Powershard.png|link=]] [[File:Mysterious Ticket.png|link=]] 200x[[File:Glimmerstone.png|link=]] | ||
|} | |} | ||
{{top}} | |||
=== Serpent Temple (Base Floor) === | === Serpent Temple (Base Floor) === | ||
| Line 604: | Line 630: | ||
|align="center"| [[File:Inspiration of an Expert.png|link=]] [[File:Charisma of an Expert.png|link=]] [[File:Book of Precision.png|link=]] [[File:Will Topaz.png|link=]] [[File:Red Sung Ma Rune.png|link=]] [[File:Purple Sung Ma Rune.png|link=]] [[File:Blue Sung Ma Rune.png|link=]] [[File:Green Sung Ma Rune.png|link=]] [[File:9th Path Book Chest.png|link=]] [[File:Bosstruhe.png|link=[[Yohara Treasure Chest]]]] 5x[[File:Serpent Dust.png|link=]] [[File:Serpent Design.png|link=]] [[File:Shimmering Seashell.png|link=]] [[File:Glove Design.png|link=]] [[File:Talent Potion.png|link=]] 3x[[File:Night Jadite.png|link=]] [[File:Smoky Jadite.png|link=]] [[File:Perfect Chest.png|link=[[Perfect Chest]]]] [[File:Random Treasure Chest.png|link=[[Random Treasure Chest]]]] 5x[[File:Northwind Blossom.png|link=]] [[File:Demon Stone.png|link=]]+4 [[File:Aura Fire Rune (10).png|link=]] [[File:Holy Powershard.png|link=]] [[File:Mysterious Ticket.png|link=]] 200x[[File:Glimmerstone.png|link=]] | |align="center"| [[File:Inspiration of an Expert.png|link=]] [[File:Charisma of an Expert.png|link=]] [[File:Book of Precision.png|link=]] [[File:Will Topaz.png|link=]] [[File:Red Sung Ma Rune.png|link=]] [[File:Purple Sung Ma Rune.png|link=]] [[File:Blue Sung Ma Rune.png|link=]] [[File:Green Sung Ma Rune.png|link=]] [[File:9th Path Book Chest.png|link=]] [[File:Bosstruhe.png|link=[[Yohara Treasure Chest]]]] 5x[[File:Serpent Dust.png|link=]] [[File:Serpent Design.png|link=]] [[File:Shimmering Seashell.png|link=]] [[File:Glove Design.png|link=]] [[File:Talent Potion.png|link=]] 3x[[File:Night Jadite.png|link=]] [[File:Smoky Jadite.png|link=]] [[File:Perfect Chest.png|link=[[Perfect Chest]]]] [[File:Random Treasure Chest.png|link=[[Random Treasure Chest]]]] 5x[[File:Northwind Blossom.png|link=]] [[File:Demon Stone.png|link=]]+4 [[File:Aura Fire Rune (10).png|link=]] [[File:Holy Powershard.png|link=]] [[File:Mysterious Ticket.png|link=]] 200x[[File:Glimmerstone.png|link=]] | ||
|} | |} | ||
{{top}} | |||
=== Northwind Canyon === | === Northwind Canyon === | ||
| Line 633: | Line 660: | ||
|align="center"| [[File:Inspiration of a Rookie.png|link=]] [[File:Inspiration of an Adept.png|link=]] [[File:Inspiration of an Expert.png|link=]] [[File:Charisma of a Rookie.png|link=]] [[File:Charisma of an Adept.png|link=]] [[File:Charisma of an Expert.png|link=]] [[File:Talent Potion.png|link=]] [[File:Leather Hardener.png|link=]] [[File:Leather Hardener+.png|link=]] [[File:9th Path Book Chest.png|link=]] [[File:Bosstruhe.png|link=[[Yohara Treasure Chest]]]] [[File:Random Treasure Chest.png|link=[[Random Treasure Chest]]]] [[File:Shimmering Seashell.png|link=]] [[File:Serpent Stone.png|link=]] [[File:Serpent Stone+.png|link=]] [[File:Serpent Design.png|link=]] [[File:Serpent Silk.png|link=]] [[File:Will Topaz.png|link=]] [[File:Smoky Jadite.png|link=]] [[File:Elixir Sung Ma St. (STR).png|link=]] [[File:Elixir Sung Ma St. (VIT).png|link=]] [[File:Elixir Sung Ma St. (RES).png|link=]] [[File:Elixir Sung Ma St. (INT).png|link=]] 5x[[File:Frost Root.png|link=]] [[File:Demon Stone.png|link=]]+4 [[File:Aura Fire Rune (10).png|link=]] [[File:Holy Powershard.png|link=]] 200x[[File:Glimmerstone.png|link=]] | |align="center"| [[File:Inspiration of a Rookie.png|link=]] [[File:Inspiration of an Adept.png|link=]] [[File:Inspiration of an Expert.png|link=]] [[File:Charisma of a Rookie.png|link=]] [[File:Charisma of an Adept.png|link=]] [[File:Charisma of an Expert.png|link=]] [[File:Talent Potion.png|link=]] [[File:Leather Hardener.png|link=]] [[File:Leather Hardener+.png|link=]] [[File:9th Path Book Chest.png|link=]] [[File:Bosstruhe.png|link=[[Yohara Treasure Chest]]]] [[File:Random Treasure Chest.png|link=[[Random Treasure Chest]]]] [[File:Shimmering Seashell.png|link=]] [[File:Serpent Stone.png|link=]] [[File:Serpent Stone+.png|link=]] [[File:Serpent Design.png|link=]] [[File:Serpent Silk.png|link=]] [[File:Will Topaz.png|link=]] [[File:Smoky Jadite.png|link=]] [[File:Elixir Sung Ma St. (STR).png|link=]] [[File:Elixir Sung Ma St. (VIT).png|link=]] [[File:Elixir Sung Ma St. (RES).png|link=]] [[File:Elixir Sung Ma St. (INT).png|link=]] 5x[[File:Frost Root.png|link=]] [[File:Demon Stone.png|link=]]+4 [[File:Aura Fire Rune (10).png|link=]] [[File:Holy Powershard.png|link=]] 200x[[File:Glimmerstone.png|link=]] | ||
|} | |} | ||
{{top}} | |||
=== Soul Gorge === | === Soul Gorge === | ||
| Line 662: | Line 690: | ||
|align="center"| [[File:Inspiration of a Rookie.png|link=]] [[File:Inspiration of an Adept.png|link=]] [[File:Inspiration of an Expert.png|link=]] [[File:Charisma of a Rookie.png|link=]] [[File:Charisma of an Adept.png|link=]] [[File:Charisma of an Expert.png|link=]] [[File:Talent Potion.png|link=]] [[File:Leather Hardener.png|link=]] [[File:Leather Hardener+.png|link=]] [[File:9th Path Book Chest.png|link=]] [[File:Bosstruhe.png|link=[[Yohara Treasure Chest]]]] [[File:Random Treasure Chest.png|link=[[Random Treasure Chest]]]] [[File:Shimmering Seashell.png|link=]] [[File:Serpent Stone.png|link=]] [[File:Serpent Stone+.png|link=]] [[File:Serpent Design.png|link=]] [[File:Serpent Silk.png|link=]] [[File:Will Topaz.png|link=]] [[File:Smoky Jadite.png|link=]] [[File:Northwind Anvil.png|link=]] [[File:Northwind Soulstone.png|link=]] [[File:Elixir Sung Ma St. (STR).png|link=]] [[File:Elixir Sung Ma St. (VIT).png|link=]] [[File:Elixir Sung Ma St. (RES).png|link=]] [[File:Elixir Sung Ma St. (INT).png|link=]] 5x[[File:Frost Root.png|link=]] [[File:Demon Stone.png|link=]]+4 [[File:Aura Fire Rune (10).png|link=]] [[File:Holy Powershard.png|link=]] 200x[[File:Glimmerstone.png|link=]] | |align="center"| [[File:Inspiration of a Rookie.png|link=]] [[File:Inspiration of an Adept.png|link=]] [[File:Inspiration of an Expert.png|link=]] [[File:Charisma of a Rookie.png|link=]] [[File:Charisma of an Adept.png|link=]] [[File:Charisma of an Expert.png|link=]] [[File:Talent Potion.png|link=]] [[File:Leather Hardener.png|link=]] [[File:Leather Hardener+.png|link=]] [[File:9th Path Book Chest.png|link=]] [[File:Bosstruhe.png|link=[[Yohara Treasure Chest]]]] [[File:Random Treasure Chest.png|link=[[Random Treasure Chest]]]] [[File:Shimmering Seashell.png|link=]] [[File:Serpent Stone.png|link=]] [[File:Serpent Stone+.png|link=]] [[File:Serpent Design.png|link=]] [[File:Serpent Silk.png|link=]] [[File:Will Topaz.png|link=]] [[File:Smoky Jadite.png|link=]] [[File:Northwind Anvil.png|link=]] [[File:Northwind Soulstone.png|link=]] [[File:Elixir Sung Ma St. (STR).png|link=]] [[File:Elixir Sung Ma St. (VIT).png|link=]] [[File:Elixir Sung Ma St. (RES).png|link=]] [[File:Elixir Sung Ma St. (INT).png|link=]] 5x[[File:Frost Root.png|link=]] [[File:Demon Stone.png|link=]]+4 [[File:Aura Fire Rune (10).png|link=]] [[File:Holy Powershard.png|link=]] 200x[[File:Glimmerstone.png|link=]] | ||
|} | |} | ||
{{top}} | |||
Revision as of 14:19, 6 November 2022
General Information
Boss respawn timers start once the Boss is killed.
Boss Chests are clickable to view their content.
Old Continent
Map1
| Boss | Respawn time | Where to find | Drops |
|---|---|---|---|
Lycos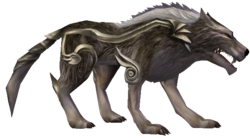
|
10 minutes | 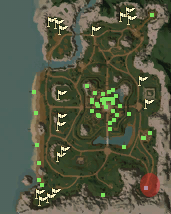 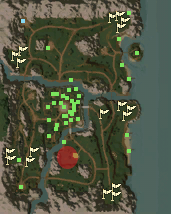 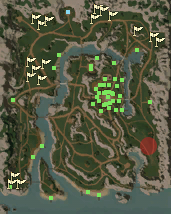
|
|
Scrofa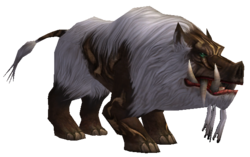
|
10 minutes | 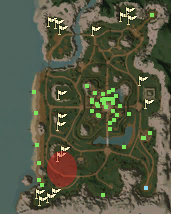 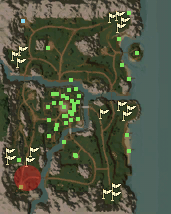 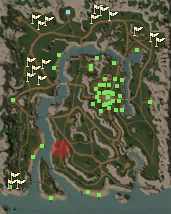
|
|
Bera
|
10 minutes | 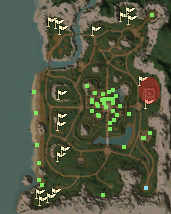 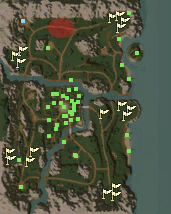 
|
|
Tigris
|
10 minutes | 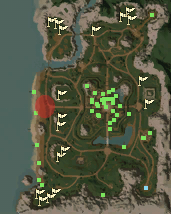 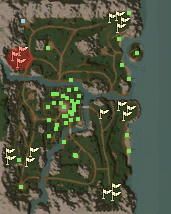 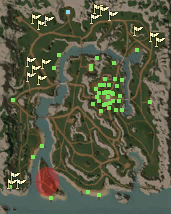
|
▲ Go to the top ▲
Map 2
| Boss | Respawn time | Where to find | Drops |
|---|---|---|---|
Mahon
|
10 minutes | 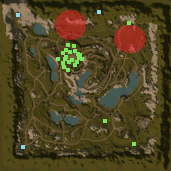 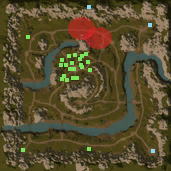 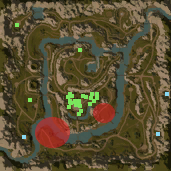
|
|
Bo
|
10 minutes | 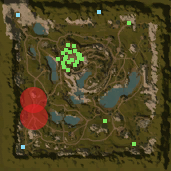 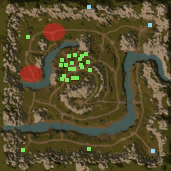 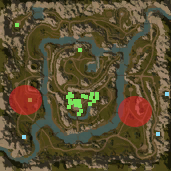
|
|
Goo-Pae
|
10 minutes | 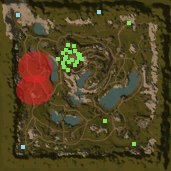 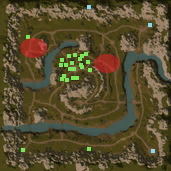 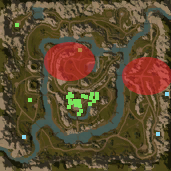
|
|
Chuong
|
10 minutes | 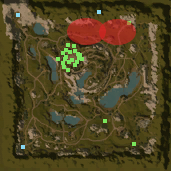 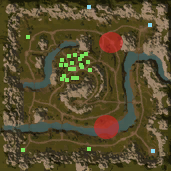 
|
|
Bestial Captain
|
10 minutes | 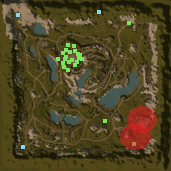 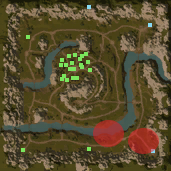 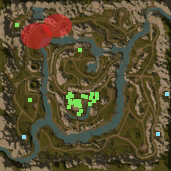
|
▲ Go to the top ▲
Ape Dungeon
| Boss | Respawn time | Where to find | Drops |
|---|---|---|---|
Rock Ape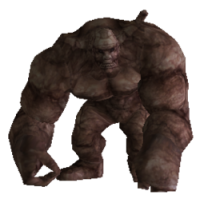
|
20 minutes | 
|
|
Walking Ape
|
20 minutes | 
|
|
Ape Lord
|
20 minutes | 
|
▲ Go to the top ▲
Valley of Seungryong
| Boss | Respawn time | Where to find | Drops |
|---|---|---|---|
Chief Orc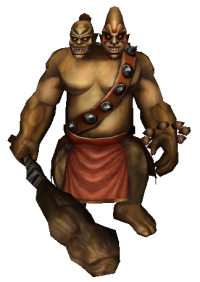
|
25 minutes | A second Chief Orc spawns in a random location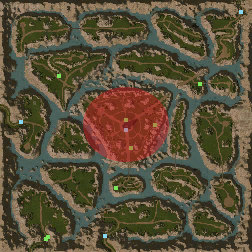
|
▲ Go to the top ▲
Yongbi Desert
| Boss | Respawn time | Where to find | Drops |
|---|---|---|---|
Giant Tortoise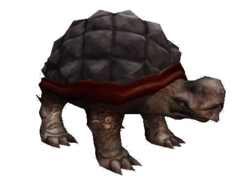
|
25 minutes | A second Giant Tortoise spawns in a random location
|
▲ Go to the top ▲
Hwang-Temple
| Boss | Respawn time | Where to find | Drops |
|---|---|---|---|
Dark-Ghost Leader
|
25 minutes | 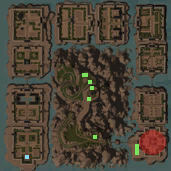
|
|
Yellow Tiger Ghost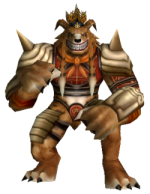
|
25 minutes | A second Yellow Tiger Ghost spawns in a random location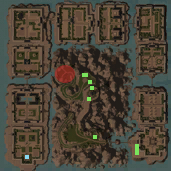
|
▲ Go to the top ▲
Spider Dungeon 1
| Boss | Respawn time | Where to find | Drops |
|---|---|---|---|
Queen Spider
|
30 minutes | 
|
▲ Go to the top ▲
Spider Dungeon 2
| Boss | Respawn time | Where to find | Drops |
|---|---|---|---|
| Queen Spider
|
30 minutes | 
|
▲ Go to the top ▲
Mount Sohan
| Boss | Respawn time | Where to find | Drops |
|---|---|---|---|
Nine Tails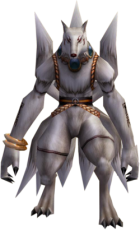
|
25 minutes | A second Nine Tails spawns in a random location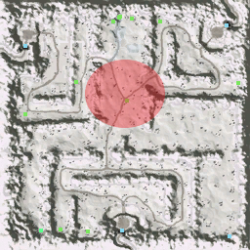
|
▲ Go to the top ▲
Doyyumhwan
| Boss | Respawn time | Where to find | Drops |
|---|---|---|---|
Flame King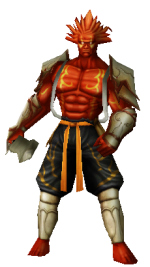
|
25 minutes | A second Flame King spawns in a random location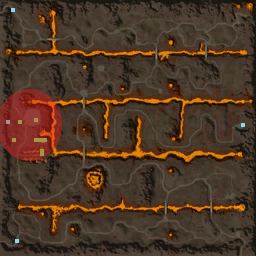
|
▲ Go to the top ▲
Grotto of Exile 1
| Boss | Respawn time | Where to find | Drops |
|---|---|---|---|
Mighty Ice Witch
|
1 hour | Can randomly spawn everywhere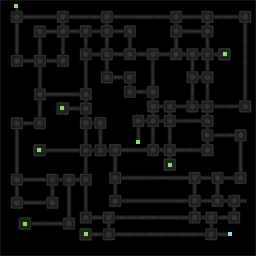
|
▲ Go to the top ▲
Grotto of Exile 2
| Boss | Respawn time | Where to find | Drops |
|---|---|---|---|
Captain Yonghan
|
20 minutes | A second Captain Yonghan spawns in a random location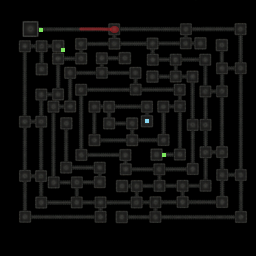
|
▲ Go to the top ▲
Cape Dragon Fire
| Boss | Respawn time | Where to find | Drops |
|---|---|---|---|
Gnoll Lord
|
1 hour | 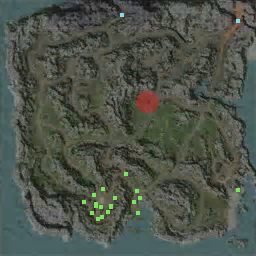
|
|
Supreme Gnoll Gurad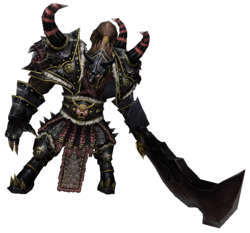
|
1 hour | 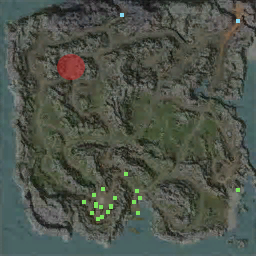
|
|
Rakshasa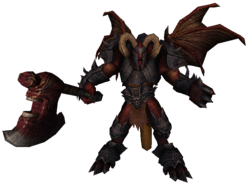
|
1 hour | 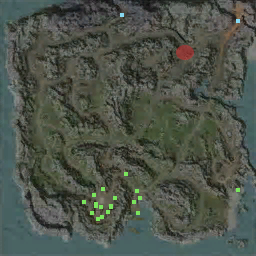
|
|
Martyaxwar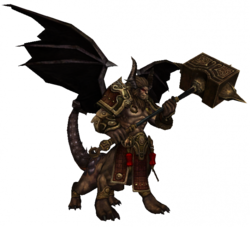
|
1 hour | 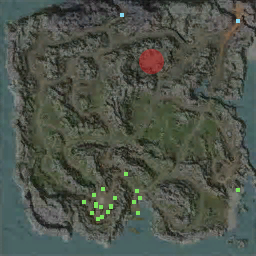
|
|
Bone Face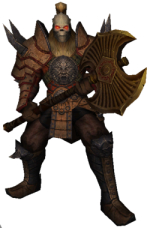
|
1 hour | 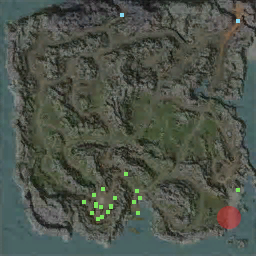
|
▲ Go to the top ▲
Nephrite Bay
| Boss | Respawn time | Where to find | Drops |
|---|---|---|---|
General Kappa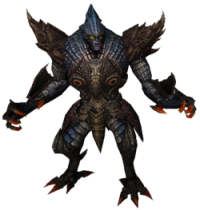
|
1 hour | 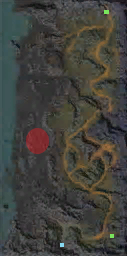
|
|
Triton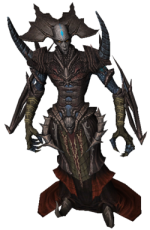
|
1 hour | 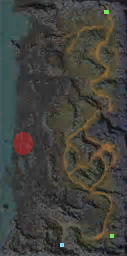
|
|
General Lobster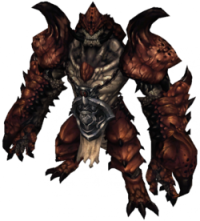
|
1 hour | 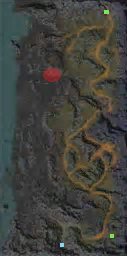
|
|
King Crab
|
1 hour | 
|
|
| Bone Face
|
1 hour | 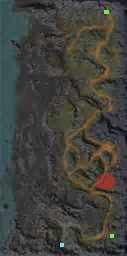
|
|
Red Chief
|
1 hour | 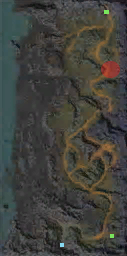
|
▲ Go to the top ▲
Thunder Mountains
| Boss | Respawn time | Where to find | Drops |
|---|---|---|---|
Brutal Bone Face
|
1 hour | 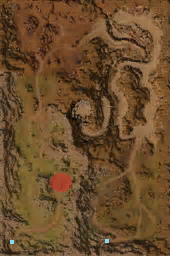
|
|
Brutal Red Chief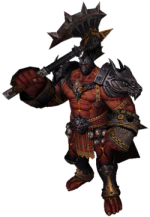
|
1 hour | 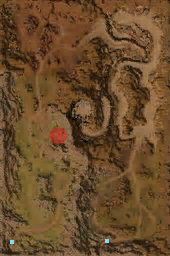
|
|
Gargoyle
|
1 hour | 
|
|
King Wubba
|
1 hour | 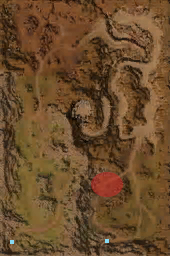
|
|
Arges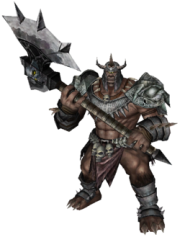
|
1 hour | 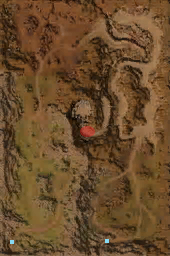
|
|
Polyphemos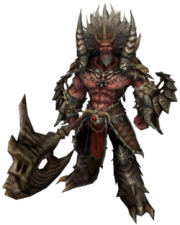
|
1 hour | 
|
▲ Go to the top ▲
Gautamacliff
| Boss | Respawn time | Where to find | Drops |
|---|---|---|---|
Captain Shruk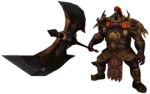
|
1 hour | 
|
|
The Great Ogre
|
1 hour | 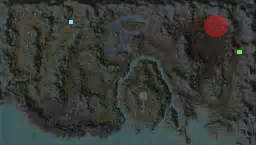
|
|
Lemures Prince
|
1 hour | 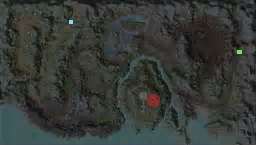
|
|
Lemures Bodyguard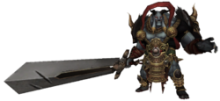
|
1 hour | 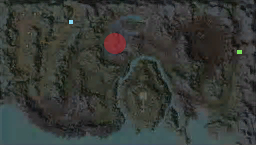
|
|
Aku-Boku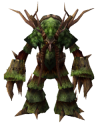
|
2 hours | 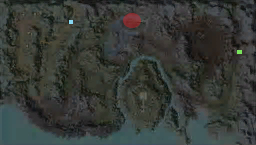
|
|
| Arboretum
|
2 hours | 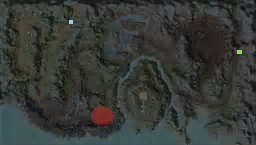
|
|
| Sycomore
|
2 hours | 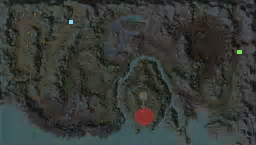
|
▲ Go to the top ▲
Temple of Ochao
| Boss | Respawn time | Where to find | Drops |
|---|---|---|---|
Ochao Bodyguard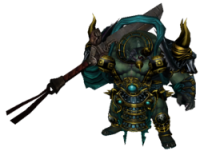
|
1 hour | 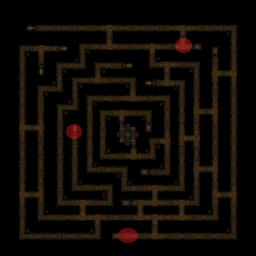
|
|
Ochao Lord
|
1 hour | 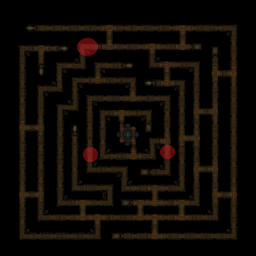
|
|
En-Tai-Guardian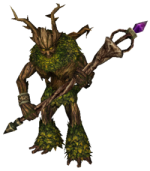
|
Always there | Changes location every 5 minutes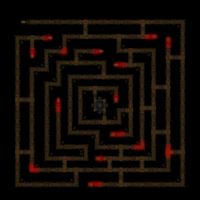
|
Opens up a Portal to enter the Enchanted Forest
|
▲ Go to the top ▲
New Continent (Yohara)
Abandoned Fortress
| Boss | Respawn time | Where to find | Drops |
|---|---|---|---|
Kao (Ice)
|
1 hour | 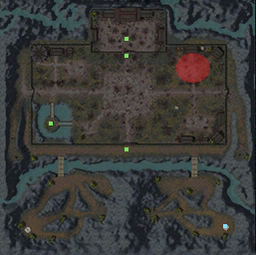
|
|
Kao (Darkness)
|
1 hour | 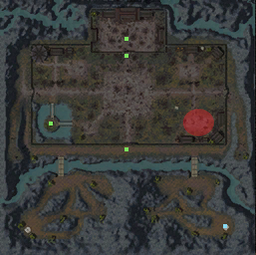
|
|
King Bao
|
1 hour | 
|
▲ Go to the top ▲
Dong Gwang Plain
| Boss | Respawn time | Where to find | Drops |
|---|---|---|---|
Natanan (Fire)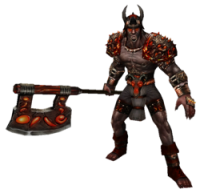
|
1 hour | 
|
|
Argos (Darkness)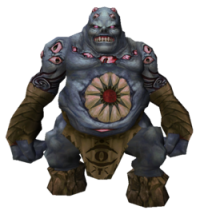
|
1 hour | 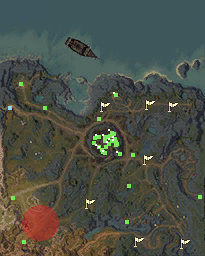
|
|
Argos (Fire)
|
1 hour | 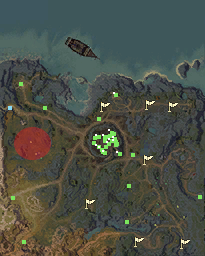
|
▲ Go to the top ▲
Gnoll Cave Floor 1
| Boss | Respawn time | Where to find | Drops |
|---|---|---|---|
Gnoll Master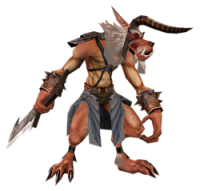
|
30 minutes | 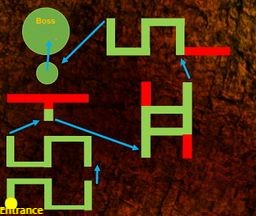
|
|
| Gnoll Captain
|
1 hour |
|
▲ Go to the top ▲
Gnoll Cave Floor 2
| Boss | Respawn time | Where to find | Drops |
|---|---|---|---|
Ahtrin Captain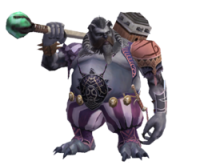
|
45 minutes | 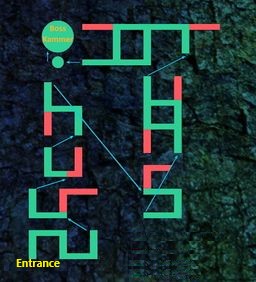
|
|
Ahtrin Captain
|
1 hour 30 minutes |
|
▲ Go to the top ▲
Gnoll Cave Floor 3
| Boss | Respawn time | Where to find | Drops |
|---|---|---|---|
Ahtrin Master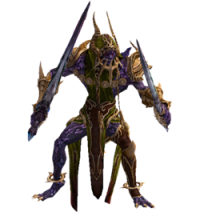
|
1 hour | 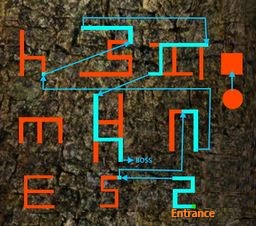
|
|
Ahtrin Grandmaster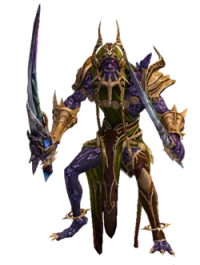
|
2 hours |
|
▲ Go to the top ▲
Seo Gwang Wastelands
| Boss | Respawn time | Where to find | Drops |
|---|---|---|---|
Quag Veteran (Earth) Quag Primus (Earth) 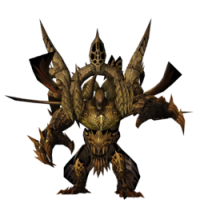
|
1 hour | either Quag Veteran or Quag Primus will spawn at those locations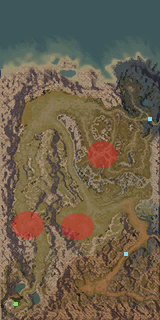
|
Quag Veteran
|
▲ Go to the top ▲
Nam Gwang Chasm
| Boss | Respawn time | Where to find | Drops |
|---|---|---|---|
Natanan (Darkness)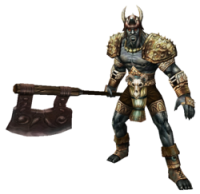
|
1 hour | 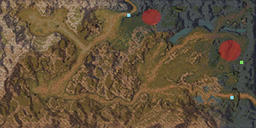
|
|
Quag Veteran (Wind)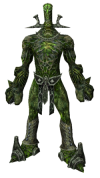 Quag Primus (Wind) 
|
1 hour | either Quag Veteran or Quag Primus will spawn at those locations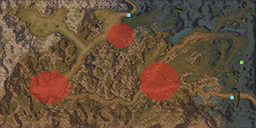
|
Quag Veteran
|
▲ Go to the top ▲
Mysterious Dungeon
| Boss | Respawn time | Where to find | Drops |
|---|---|---|---|
Mysterious Monk (Darkness) Mysterious Monk (Ice) 
|
1 hour | Can randomly spawn everywhere There is always 1 Dark & 1 Ice Mysterious Monk 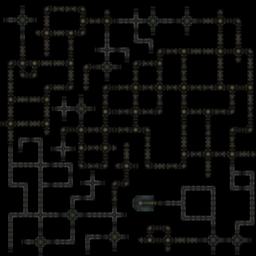
|
▲ Go to the top ▲
Yilad Pass
| Boss | Respawn time | Where to find | Drops |
|---|---|---|---|
Tainted Chief (Darkness)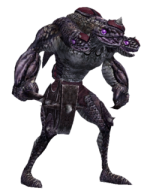 Tainted War Chief (Darkness) 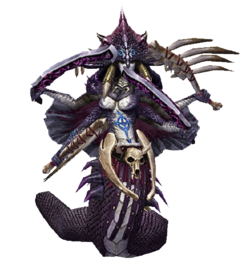
|
1 hour | either Tainted Chief (Darkness) or Tainted War Chief (Darkness) will spawn at those locations 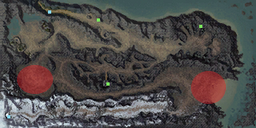
|
Tainted Chief (Darkness)
|
Tainted Chief (Earth) Tainted War Chief (Earth) 
|
1 hour | either Tainted Chief (Earth) or Tainted War Chief (Earth) will spawn at those locations 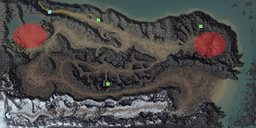
|
Tainted Chief (Earth)
|
▲ Go to the top ▲
Serpent Temple (Base Floor)
| Boss | Respawn time | Where to find | Drops |
|---|---|---|---|
Kappa-Soldier*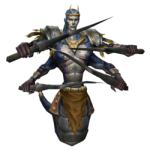
|
2 hours | Defeating Kappa-Soldier* has a chance to spawn Mighty Kappa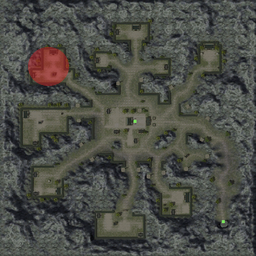
|
|
Mighty Kappa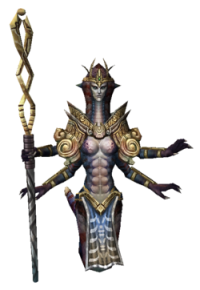
|
2 hours | 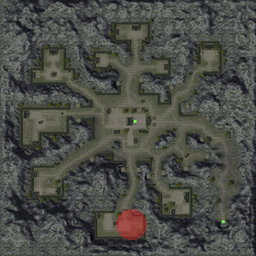
|
▲ Go to the top ▲
Northwind Canyon
| Boss | Respawn time | Where to find | Drops |
|---|---|---|---|
Frozen Chief (Lightning)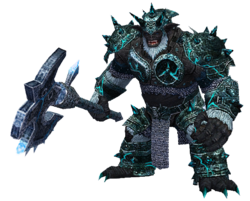
|
1 hour | 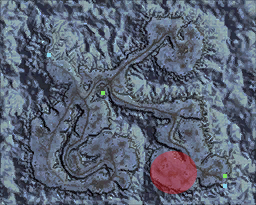
|
|
Frozen War Chief (Lightning)
|
1 hour | 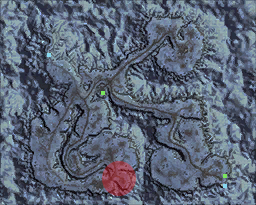
|
|
Frozen Chief (Ice)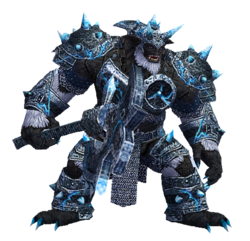
|
1 hour | 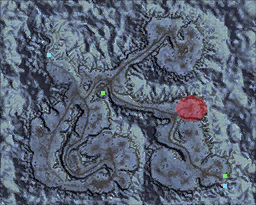
|
|
Frozen War Chief (Ice)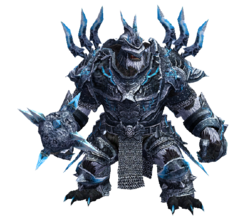
|
1 hour | 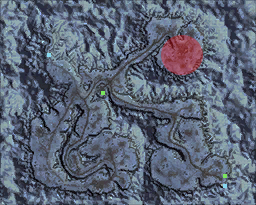
|
▲ Go to the top ▲
Soul Gorge
| Boss | Respawn time | Where to find | Drops |
|---|---|---|---|
Bigfoot (Lightning)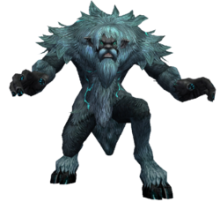
|
1 hour | 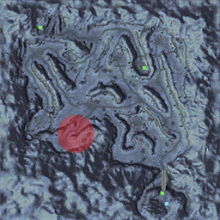
|
|
Northwind War Chief (Lightning)
|
1 hour | 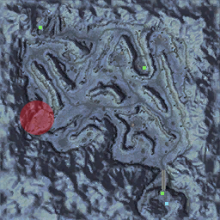
|
|
Bigfoot (Ice)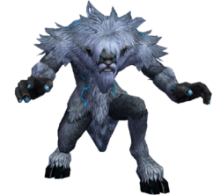
|
1 hour | 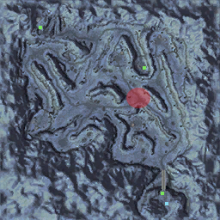
|
|
Northwind War Chief (Ice)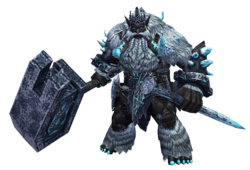
|
1 hour | 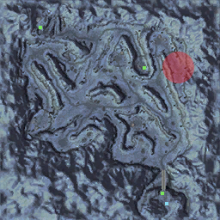
|
▲ Go to the top ▲