Mining: Difference between revisions
Jump to navigation
Jump to search
No edit summary |
|||
| (39 intermediate revisions by the same user not shown) | |||
| Line 1: | Line 1: | ||
[[File:Bergbau Banner.png|link=|center]] | [[File:Bergbau Banner.png|link=|center]] | ||
==General Information== | ==General Information== | ||
[[File:Deokbae.png|100px|link=|right]] | |||
* Mining can be used starting at '''''Level 30'''''. | * Mining can be used starting at '''''Level 30'''''. | ||
* You need a [[File:Spitzhacke.png|link=]] Pickaxe from Deokbae | * You need a [[File:Spitzhacke.png|link=]] [[Pickaxe]] from [[Deokbae]] | ||
* Ore veins appear in most areas, which can be mined. | * Ore veins appear in most areas, which can be mined. | ||
| Line 12: | Line 13: | ||
* There are 2 ways to improve your mining performance: | * There are 2 ways to improve your mining performance: | ||
::*Learning the mining skill | ::*Learning the mining skill | ||
::*Upgrading the | ::*Upgrading the [[Pickaxe]] | ||
===Mining Skill=== | ===Mining Skill=== | ||
* Mining Skill The mining skill can be improved using a [[File:Bergbau-Buch.png|link=]] | * Mining Skill The mining skill can be improved using a [[File:Bergbau-Buch.png|link=]] [[Mining Guide]]. | ||
* The progression is from 1-20, M1 - M10, G1 - G10, and P. A total of 41 books are needed. | * The progression is from 1-20, M1 - M10, G1 - G10, and P. A total of 41 books are needed. | ||
* The level of the mining skill increases the success rate when mining ore. | * The level of the mining skill increases the success rate when mining ore. | ||
===Pickaxe=== | ===Pickaxe=== | ||
* The [[File:Spitzhacke.png|link=]] | * The [[File:Spitzhacke.png|link=]] [[Pickaxe]] gains '''''10 points''''' with each mining attempt on an ore vein. | ||
* Once the points for the level are full, the | * Once the points for the level are full, the [[Pickaxe]] can be upgraded by [[Deokbae]]. | ||
* Caution: The upgrade may fail, but the | * Caution: The upgrade may fail, but the [[Pickaxe]] will not be destroyed, only lose progress. | ||
* The level of the | * The level of the [[Pickaxe]] increases the success rate when mining ore. | ||
{| {{Prettytable}} | {| {{Prettytable}} | ||
|- {{Hl3}} | |- {{Hl3}} | ||
| Line 80: | Line 80: | ||
===Success Rates=== | ===Success Rates=== | ||
* The base chance of mining ore is around 20 | * The base chance of mining ore is around 20%. | ||
* Mining skill P increases the chance by | * Mining skill P increases the chance by 11%. | ||
* A +9 | * A +9 [[Pickaxe]] increases the chance by 50%. | ||
* Overall, the maximum chance is | * Overall, the maximum chance is 81%. | ||
==Usage== | ==Usage== | ||
[[File:Alchemist.png|100px|link=|right]] | [[File:Alchemist.png|100px|link=|right]] | ||
* Ores can be refined by the guild alchemist. | * Ores can be refined by the [[Alchemist_(Guilds)|guild alchemist]]. | ||
* Refined ores can be embedded into jewelry. | * Refined ores can be embedded into jewelry. | ||
* To do this, a slot must be unlocked in the jewelry using a | * To do this, a slot must be unlocked in the jewelry using a [[File:Diamant.png|link=]] [[Diamond]]. | ||
* Each piece of jewelry has 3 slots. | :* Each piece of jewelry has 3 slots. | ||
* An embedded ore enhances the base stats of a jewelry piece for a certain amount of time. | * An embedded ore enhances the base stats of a jewelry piece for a certain amount of time. | ||
{| {{Prettytable}} | |||
|- {{Hl3}} | |||
! Position | |||
! Duration | |||
! Bonus | |||
|- | |||
|style="text-align:center"| 1 | |||
|style="text-align:right"| 24 h | |||
|style="text-align:center"| <10% | |||
|- | |||
|style="text-align:center"| 2 | |||
|style="text-align:right"| 12 h | |||
|style="text-align:center"| 10% | |||
|- | |||
|style="text-align:center"| 3 | |||
|style="text-align:right"| 6 h | |||
|style="text-align:center"| 20% | |||
|- | |||
|} | |||
==Refining Ores== | |||
* Mined ore can be refined in a guild furnace using a [[File:Stein gegen Ninja.png|link=]] spirit stone (+0/+1/+2/+3). | |||
* An exception is the [[File:Diamantstein.png|link=]] diamond stone, which does not require a stone for refining. | |||
* Each alchemist specializes in one type of ore and can refine it with a 60% success rate. | |||
:* At [[Events#Mining_Event|Mining Event]] you additionally '''''grant +10% sucsess rate''''' on top, to a '''''total of 70%'''''. | |||
* For all other ores, the success rate is 30%. | |||
:* At [[Events#Mining_Event|Mining Event]] you additionally '''''grant +10% sucsess rate''''' on top, to a '''''total of 40%'''''. | |||
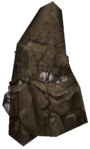
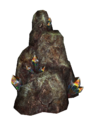
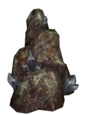
==Ore Veins== | |||
* Ore veins appear randomly on maps. | |||
* An ore vein remains for approximately 10 minutes before disappearing again. | |||
* An ore vein has a cooldown of 30 minutes. | |||
{| {{Prettytable}} | |||
|- {{Hl3}} | |||
! Ore Vein | |||
! Ore | |||
! Refined | |||
! Maps | |||
|- | |||
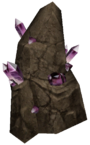
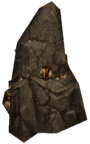
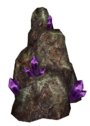
| align="center" | [[File:Quarzader.png|link=]]<br>[[Vein Of Amethyst Ore]] | |||
| [[File:Amethysterz.png|link=]] [[Amethyst Ore]] | |||
| [[File:Amethyst.png|link=]] [[Amethyst]] | |||
| | |||
* [[Mount Sohan]] | |||
* [[Fireland]] | |||
* [[Hwang-Tempel]] | |||
|- | |||
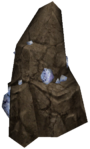
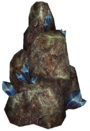
| align="center" | [[File:Diamantader.png|link=]]<br>[[Vein Of Diamond Ore]] | |||
| [[File:Diamantstein.png|link=]] [[Diamond Stone]] | |||
| [[File:Diamant.png|link=]] [[Diamond]] | |||
| | |||
* [[Bakra]] | |||
* [[Mount Sohan]] | |||
* [[Bokjung]] | |||
* [[Hwang-Tempel]] | |||
* [[Imha]] | |||
* [[Yayang]] | |||
* [[Joan]] | |||
* [[Jungrang]] | |||
* [[Pyungmoo]] | |||
* [[Valley of Seungryong]] | |||
* [[Waryong]] | |||
* [[Yongan]] | |||
|- | |||
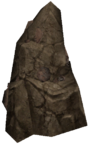
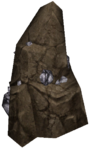
| align="center" | [[File:Ebenholzader.png|link=]]<br>[[Vein Of Ebony Ore]] | |||
| [[File:Ebenholzerz.png|link=]] [[Ebony Ore]] | |||
| [[File:Ebenholz.png|link=]] [[Ebony]] | |||
| | |||
* [[Bakra]] | |||
* [[Mount Sohan]] | |||
* [[Bokjung]] | |||
* [[Hwang-Tempel]] | |||
* [[Imha]] | |||
* [[Yayang]] | |||
* [[Jungrang]] | |||
* [[Valley of Seungryong]] | |||
* [[Waryong]] | |||
* [[Yongbi Desert]] | |||
|- | |||
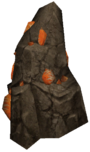
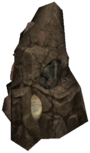
| align="center" | [[File:Fossilholzader.png|link=]]<br>[[Vein Of Fossil Trunk Ore]] | |||
| [[File:Fossiler Stamm.png|link=]] [[Fossil Trunk]] | |||
| [[File:Fossilholz.png|link=]] [[Fossil Wood]] | |||
| | |||
* [[Bakra]] | |||
* [[Bokjung]] | |||
* [[Yayang]] | |||
* [[Joan]] | |||
* [[Pyungmoo]] | |||
* [[Yongan]] | |||
|- | |||
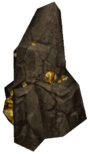
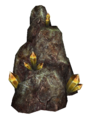
| align="center" | [[File:Goldader.png|link=]]<br>[[Vein Of Gold Ore]] | |||
| [[File:Golderz.png|link=]] [[Gold Ore]] | |||
| [[File:Gold.png|link=]] [[Gold]] | |||
| | |||
* [[Bakra]] | |||
* [[Bokjung]] | |||
* [[Yayang]] | |||
* [[Joan]] | |||
* [[Pyungmoo]] | |||
* [[Valley of Seungryong]] | |||
* [[Yongan]] | |||
|- | |||
| align="center" | [[File:Himmelstränenader.png|link=]]<br>[[Vein Of Heaven's Tear Ore]] | |||
| [[File:Himmelstränenerz.png|link=]] [[Heaven's Tear Ore]] | |||
| [[File:Himmelsträne.png|link=]] [[Heaven's Tear]] | |||
| | |||
* [[Fireland]] | |||
* [[Hwang-Tempel]] | |||
* [[Mount Sohan]] | |||
|- | |||
| align="center" | [[File:Jadeader.png|link=]]<br>[[Vein Of Jade Ore]] | |||
| [[File:Jadeerz.png|link=]] [[Jade Ore]] | |||
| [[File:Jade.png|link=]] [[Jade]] | |||
| | |||
* [[Bakra]] | |||
* [[Bokjung]] | |||
* [[Imha]] | |||
* [[Yayang]] | |||
* [[Jungrang]] | |||
* [[Valley of Seungryong]] | |||
* [[Waryong]] | |||
|- | |||
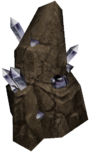
| align="center" | [[File:Kristallader.png|link=]]<br>[[Vein Of Crystal Ore]] | |||
| [[File:Kristallerz.png|link=]] [[Crystal Ore]] | |||
| [[File:Kristall.png|link=]] [[Crystal]] | |||
| | |||
* [[Mount Sohan]] | |||
* [[Fireland]] | |||
* [[Hwang-Tempel]] | |||
* [[Imha]] | |||
* [[Jungrang]] | |||
* [[Waryong]] | |||
* [[Yongbi Desert]] | |||
|- | |||
| align="center" | [[File:Kupferader.png|link=]]<br>[[Vein Of Copper Ore]] | |||
| [[File:Kupfererz.png|link=]] [[Copper Ore]] | |||
| [[File:Kupfer.png|link=]] [[Copper]] | |||
| | |||
* [[Bakra]] | |||
* [[Bokjung]] | |||
* [[Yayang]] | |||
* [[Joan]] | |||
* [[Pyungmoo]] | |||
* [[Yongan]] | |||
|- | |||
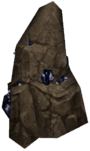
| align="center" | [[File:Saphirader.png|link=]]<br>[[Vein of Soul Crystal Ore]] | |||
| [[File:Seelenkristallerz.png|link=]] [[Soul Crystal Ore]] | |||
| [[File:Seelenkristall.png|link=]] [[Soul Crystal]] | |||
| | |||
* [[Cape Dragon Fire]] | |||
* [[Nephrite Bay]] | |||
* [[Thunder Mountains]] | |||
* [[Gautama Cliff]] | |||
|- | |||
| align="center" | [[File:Silberader.png|link=]]<br>[[Vein Of Silver Ore]] | |||
| [[File:Silbererz.png|link=]] [[Silver Ore]] | |||
| [[File:Silber.png|link=]] [[Silver]] | |||
| | |||
* [[Bakra]] | |||
* [[Bokjung]] | |||
* [[Yayang]] | |||
* [[Joan]] | |||
* [[Pyungmoo]] | |||
* [[Yongan]] | |||
|- | |||
| align="center" | [[File:Muschelstapel.png|link=]]<br>[[Pile Of Clams]] | |||
| [[File:Stück Perle.png|link=]] [[Piece of Pearl]] | |||
| [[File:Perle.png|link=]] [[Pearl]] | |||
| | |||
* [[Mount Sohan]] | |||
* [[Fireland]] | |||
* [[Hwang-Tempel]] | |||
* [[Imha]] | |||
* [[Jungrang]] | |||
* [[Valley of Seungryong]] | |||
* [[Waryong]] | |||
* [[Yongbi Desert]] | |||
|- | |||
| align="center" | [[File:Weißgoldader.png|link=]]<br>[[Vein Of White Gold Ore]] | |||
| [[File:Weißgolderz.png|link=]] [[White Gold Ore]] | |||
| [[File:Weißgold.png|link=]] [[White Gold]] | |||
| | |||
* [[Mount Sohan]] | |||
* [[Fireland]] | |||
* [[Hwang-Tempel]] | |||
* [[Imha]] | |||
* [[Jungrang]] | |||
* [[Valley of Seungryong]] | |||
* [[Waryong]] | |||
* [[Yongbi Desert]] | |||
|- | |||
| align="center" | [[File:Granatader.png|link=]]<br>[[Vein of Garnet Ore]] | |||
| [[File:Granaterz.png|link=]] [[Garnet Ore]] | |||
| [[File:Granat.png|link=]] [[Garnet]] | |||
| | |||
* [[Cape Dragon Fire]] | |||
* [[Nephrite Bay]] | |||
* [[Thunder Mountains]] | |||
* [[Gautama Cliff]] | |||
|- | |||
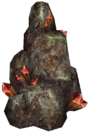
| align="center" | [[File:Rubinader.png|link=]]<br>[[Vein of Ruby Ore]] | |||
| [[File:Rubinerz.png|link=]] [[Ruby Ore]] | |||
| [[File:Rubin.png|link=]] [[Ruby]] | |||
| | |||
* [[Cape Dragon Fire]] | |||
* [[Nephrite Bay]] | |||
* [[Thunder Mountains]] | |||
* [[Gautama Cliff]] | |||
|- | |||
| align="center" | [[File:Saphirader.png|link=]]<br>[[Vein of Sapphire Ore]] | |||
| [[File:Saphirerz.png|link=]] [[Sapphire Ore]] | |||
| [[File:Saphir.png|link=]] [[Sapphire]] | |||
| | |||
* [[Cape Dragon Fire]] | |||
* [[Nephrite Bay]] | |||
* [[Thunder Mountains]] | |||
* [[Gautama Cliff]] | |||
|- | |||
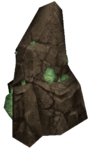
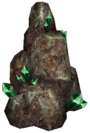
| align="center" | [[File:Smaragdader.png|link=]]<br>[[Vein of Emerald Ore]] | |||
| [[File:Smaragderz.png|link=]] [[Emerald Ore]] | |||
| [[File:Smaragd.png|link=]] [[Emerald]] | |||
| | |||
* [[Cape Dragon Fire]] | |||
* [[Nephrite Bay]] | |||
* [[Thunder Mountains]] | |||
* [[Gautama Cliff]] | |||
|- | |||
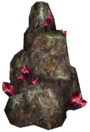
| align="center" | [[File:Turmalinader.png|link=]]<br>[[Vein of Tourmaline Ore]] | |||
| [[File:Turmalinerz.png|link=]] [[Tourmaline Ore]] | |||
| [[File:Turmalin.png|link=]] [[Tourmaline]] | |||
| | |||
* [[Cape Dragon Fire]] | |||
* [[Nephrite Bay]] | |||
* [[Thunder Mountains]] | |||
* [[Gautama Cliff]] | |||
|- | |||
| align="center" | [[File:Nebeljeditader.png|link=]]<br>[[Vein of Fog Jadite Ore]] | |||
| [[File:Nebeljediterz.png|link=]] Fog Jadite Ore | |||
| [[File:Fog_Jadite.png|link=]] Fog Jadite | |||
| | |||
* [[Dong Gwang Plain]] | |||
* [[Seo Gwang Wastelands]] | |||
* [[Nam Gwang Chasm]] | |||
|- | |||
| align="center" | [[File:Sonnenjeditader.png|link=]]<br>[[Vein of Sun Jadite Ore]] | |||
| [[File:Sonnenjediterz.png|link=]] Sun Jadite Ore | |||
| [[File:Sun_Jadite.png|link=]] Sun Jadite | |||
| | |||
* [[Dong Gwang Plain]] | |||
* [[Seo Gwang Wastelands]] | |||
* [[Nam Gwang Chasm]] | |||
|- | |||
| align="center" | [[File:Rauchjeditader.png|link=]]<br>[[Vein of Smoky Jadite Ore]] | |||
| [[File:Rauchjediterz.png|link=]] Smoky Jadite Ore | |||
| [[File:Smoky_Jadite.png|link=]] Smoky Jadite | |||
| | |||
* [[Seo Gwang Wastelands]] | |||
* [[Nam Gwang Chasm]] | |||
|} | |||
Latest revision as of 11:37, 27 October 2024
General Information

- Mining can be used starting at Level 30.
- You need a
 Pickaxe from Deokbae
 - Ore veins appear in most areas, which can be mined.
Improving Mining
- There are 2 ways to improve your mining performance:
- Learning the mining skill
- Upgrading the Pickaxe
Mining Skill
- Mining Skill The mining skill can be improved using a
 Mining Guide.
 - The progression is from 1-20, M1 - M10, G1 - G10, and P. A total of 41 books are needed.
- The level of the mining skill increases the success rate when mining ore.
Pickaxe
- The Pickaxe gains 10 points with each mining attempt on an ore vein.
- Once the points for the level are full, the Pickaxe can be upgraded by Deokbae.
- Caution: The upgrade may fail, but the Pickaxe will not be destroyed, only lose progress.
- The level of the Pickaxe increases the success rate when mining ore.
| Level | Level of Pickaxe | needed Points | Succsessrate on Upgrading |
|---|---|---|---|
| 1 | +0 | 6.000 | 100% |
| 2 | +1 | 12.000 | 61% |
| 3 | +2 | 24.000 | 61% |
| 4 | +3 | 48.000 | 61% |
| 5 | +4 | 96.000 | 61% |
| 6 | +5 | 192.000 | 61% |
| 7 | +6 | 384.000 | 61% |
| 8 | +7 | 768.000 | 61% |
| 9 | +8 | 1.536.000 | 61% |
Success Rates
- The base chance of mining ore is around 20%.
- Mining skill P increases the chance by 11%.
- A +9 Pickaxe increases the chance by 50%.
- Overall, the maximum chance is 81%.
Usage

- Ores can be refined by the guild alchemist.
- Refined ores can be embedded into jewelry.
- To do this, a slot must be unlocked in the jewelry using a
 Diamond.
- Each piece of jewelry has 3 slots.
- An embedded ore enhances the base stats of a jewelry piece for a certain amount of time.
| Position | Duration | Bonus |
|---|---|---|
| 1 | 24 h | <10% |
| 2 | 12 h | 10% |
| 3 | 6 h | 20% |
Refining Ores
- Mined ore can be refined in a guild furnace using a
 spirit stone (+0/+1/+2/+3).
 - An exception is the
 diamond stone, which does not require a stone for refining.
 - Each alchemist specializes in one type of ore and can refine it with a 60% success rate.
- At Mining Event you additionally grant +10% sucsess rate on top, to a total of 70%.
- For all other ores, the success rate is 30%.
- At Mining Event you additionally grant +10% sucsess rate on top, to a total of 40%.
Ore Veins
- Ore veins appear randomly on maps.
- An ore vein remains for approximately 10 minutes before disappearing again.
- An ore vein has a cooldown of 30 minutes.