|
|
| (9 intermediate revisions by the same user not shown) |
| Line 1: |
Line 1: |
| {{Subpage|[[Main Page|Metin2Wiki]]|[[:Category:NPC|NPC-Overview]]}} | | {{NPC/LayoutV2 |
|
| |
|
| <table width="100%" style="border: 1px solid #97100d; border-top-left-radius: 10px; border-top-right-radius: 10px; box-shadow:2px 2px 5px #000000; background: #FFFFE0; padding: 0px; border-spacing: 0px;"> | | <!-- Function of the NPC (use <ul or br>) --> |
| <tr>
| | |Function = <br> |
| <td colspan="2" style="font-size: 14px; color: #f0d9a2; border-top-left-radius: 9px; border-top-right-radius: 9px; padding: 5px 5px 5px 10px; background: #5d0505;">'''{{PAGENAME}}'''
| | *From level 110, it can teleport you to the [[Plateau of Illusions]] |
| </td>
| | *Crafting: |
| </tr>
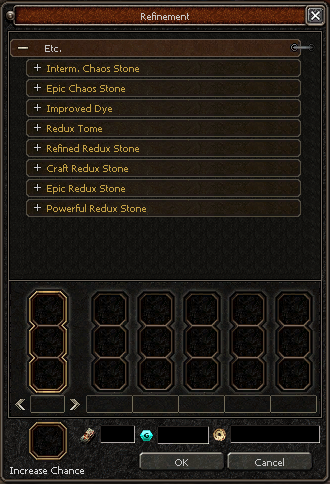
| | [[File:Illusion Statue Refinement.png|link=]] |
| <tr>
| |
| <td valign="top" align="center" style="padding-top: 0px;">
| |
| <div align="center" style="width: 200px;">
| |
| <div align="center" style="width: 150px; border: 1px solid #35215f; border-bottom-left-radius: 10px; border-bottom-right-radius: 10px; box-shadow:2px 2px 5px #000000; background: #35215f; color: #dadada; font-weight: bold; padding: 5px;">Image</div>
| |
| </div>
| |
| </td>
| |
| <td valign="top" align="center" width="100%" style="padding-top: 0px;">
| |
| <div align="center" style="width: 150px; border: 1px solid #35215f; border-bottom-left-radius: 10px; border-bottom-right-radius: 10px; box-shadow:2px 2px 5px #000000; background: #35215f; color: #dadada; font-weight: bold; padding: 5px;">Location</div>
| |
| </td>
| |
| </tr>
| |
| <tr>
| |
| <td align="center" style="padding-left: 10px; border-right: 1px dashed #88283a;">
| |
| {{#ifexist: Media:{{PAGENAME}}.png | [[File:{{PAGENAME}}.png | x200px ]] | {{#ifexist: Media:{{PAGENAME}}.jpg | [[File:{{PAGENAME}}.jpg | x200px ]] | ''No image available'' }} }}
| |
| </td>
| |
| <td valign="top"><div align="center" style="padding-left: 10px; padding-top: 10px;">
| |
| {{#ifexpr: {{#if: {{{Bakra| }}} | 1 | 0 }}
| |
| or {{#if: {{{Mount Sohan| }}} | 1 | 0 }}
| |
| or {{#if: {{{Bokjung| }}} | 1 | 0 }}
| |
| or {{#if: {{{Demon Tower| }}} | 1 | 0 }}
| |
| or {{#if: {{{Doyyumhwan| }}} | 1 | 0 }}
| |
| or {{#if: {{{Hasun Dong| }}} | 1 | 0 }}
| |
| or {{#if: {{{Hwang Temple| }}} | 1 | 0 }}
| |
| or {{#if: {{{Imha| }}} | 1 | 0 }}
| |
| or {{#if: {{{Yayang| }}} | 1 | 0 }}
| |
| or {{#if: {{{Joan| }}} | 1 | 0 }}
| |
| or {{#if: {{{Jungrang| }}} | 1 | 0 }}
| |
| or {{#if: {{{Jungsun Dong| }}} | 1 | 0 }}
| |
| or {{#if: {{{Kuahlo Dong| }}} | 1 | 0 }}
| |
| or {{#if: {{{Land of Giants| }}} | 1 | 0 }}
| |
| or {{#if: {{{Lungsam| }}} | 1 | 0 }}
| |
| or {{#if: {{{Pyungmoo| }}} | 1 | 0 }}
| |
| or {{#if: {{{Red Forest| }}} | 1 | 0 }}
| |
| or {{#if: {{{Sangsun Dong| }}} | 1 | 0 }}
| |
| or {{#if: {{{Snakefield| }}} | 1 | 0 }}
| |
| or {{#if: {{{Spider Dungeon 2| }}} | 1 | 0 }}
| |
| or {{#if: {{{Valley of Seungryong| }}} | 1 | 0 }}
| |
| or {{#if: {{{Waryong| }}} | 1 | 0 }}
| |
| or {{#if: {{{Yongan| }}} | 1 | 0 }}
| |
| or {{#if: {{{Yongbi Desert| }}} | 1 | 0 }}
| |
| or {{#if: {{{Grotto of Exile| }}} | 1 | 0 }}
| |
| or {{#if: {{{Songpa| }}} | 1 | 0 }}
| |
| or {{#if: {{{Daeyami| }}} | 1 | 0 }}
| |
| or {{#if: {{{Miryang| }}} | 1 | 0 }}
| |
| or {{#if: {{{Devil's Catacomb| }}} | 1 | 0 }}
| |
| or {{#if: {{{Spider Dungeon 3| }}} | 1 | 0 }}
| |
| or {{#if: {{{Grotto of Exile V2| }}} | 1 | 0 }}
| |
| or {{#if: {{{Dragon's Temple| }}} | 1 | 0 }}
| |
| or {{#if: {{{Cape Dragon Fire| }}} | 1 | 0 }}
| |
| or {{#if: {{{Nephrite Bay| }}} | 1 | 0 }}
| |
| or {{#if: {{{Thunder Mountains| }}} | 1 | 0 }}
| |
| or {{#if: {{{Gautama Cliff| }}} | 1 | 0 }}
| |
| or {{#if: {{{Red Dragon Fortress| }}} | 1 | 0 }}
| |
| or {{#if: {{{Nemere's Watchtower| }}} | 1 | 0 }}
| |
| or {{#if: {{{Colony| }}} | 1 | 0 }}
| |
| or {{#if: {{{Temple of the Ochao| }}} | 1 | 0 }}
| |
| or {{#if: {{{Enchanted Forest| }}} | 1 | 0 }}
| |
| or {{#if: {{{Meley's Lair| }}} | 1 | 0 }}
| |
| or {{#if: {{{Zodiac Temple| }}} | 1 | 0 }}
| |
| or {{#if: {{{Harbour| }}} | 1 | 0 }}
| |
| or {{#if: {{{Abandoned Fortress| }}} | 1 | 0 }}
| |
| or {{#if: {{{Dong Gwang Plain| }}} | 1 | 0 }}
| |
| or {{#if: {{{Seo Gwang Wastelands| }}} | 1 | 0 }}
| |
| or {{#if: {{{Nam Gwang Chasm| }}} | 1 | 0 }}
| |
| or {{#if: {{{Mysterious Dungeon| }}} | 1 | 0 }}
| |
| or {{#if: {{{Yilad Pass| }}} | 1 | 0 }}
| |
| or {{#if: {{{Northwind Canyon| }}} | 1 | 0 }}
| |
| or {{#if: {{{Soul Gorge| }}} | 1 | 0 }}
| |
| or {{#if: {{{Northwind Shelter| }}} | 1 | 0 }}
| |
| or {{#if: {{{Northwind Descent| }}} | 1 | 0 }}
| |
| or {{#if: {{{Serpent Temple| }}} | 1 | 0 }}
| |
| or {{#if: {{{Sung Mahi Tower| }}} | 1 | 0 }}
| |
| or {{#if: {{{Northwind Deeps| }}} | 1 | 0 }}
| |
| or {{#if: {{{Ship Defence| }}} | 1 | 0 }}
| |
| or {{#if: {{{Plateau of Illusions| }}} | 1 | 0 }}
| |
| or {{#if: {{{Otherworld| }}} | 1 | 0 }}
| |
| or {{#if: {{{Bazaar| }}} | 1 | 0 }}
| |
| or {{#if: {{{Wedding Map| }}} | 1 | 0 }}
| |
| |
| |
| {{{!}} style="padding: 0px; border-spacing: 0px;"
| |
| {{#ifexpr: {{#if: {{{Bakra| }}} | 1 | 0 }}
| |
| or {{#if: {{{Bokjung| }}} | 1 | 0 }}
| |
| or {{#if: {{{Imha| }}} | 1 | 0 }}
| |
| or {{#if: {{{Yayang| }}} | 1 | 0 }}
| |
| or {{#if: {{{Joan| }}} | 1 | 0 }}
| |
| or {{#if: {{{Jungrang| }}} | 1 | 0 }}
| |
| or {{#if: {{{Pyungmoo| }}} | 1 | 0 }}
| |
| or {{#if: {{{Waryong| }}} | 1 | 0 }}
| |
| or {{#if: {{{Yongan| }}} | 1 | 0 }}
| |
| or {{#if: {{{Colony| }}} | 1 | 0 }}
| |
| |
| |
| {{!}}valign="top" style="padding-right: 10px; padding-bottom: 10px;"{{!}} [[Image:Flag_yellow.png | 50px ]]
| |
| {{!}}valign="top" style="padding-right: 10px;"{{!}}
| |
| {{#if: {{{Joan| }}} | [[Joan]]:<br /> }}{{#if: {{{Bokjung| }}} | [[Bokjung]]:<br /> }}{{#if: {{{Waryong| }}} | [[Waryong]]:<br /> }}{{#if: {{{Songpa| }}} | [[Songpa]]: }}{{#if: {{{Colony| }}} | [[Colony]]: }}
| |
| {{!}}valign="top" style="padding-right: 10px;"{{!}}
| |
| {{#if: {{{Joan| }}} | {{{Joan}}}<br /> }}{{#if: {{{Bokjung| }}} | {{{Bokjung}}}<br /> }}{{#if: {{{Waryong| }}} | {{{Waryong}}}<br /> }}{{#if: {{{Songpa| }}} | {{{Songpa}}} }}{{#if: {{{Colony| }}} | {{{Colony}}} }}
| |
| {{!-}}
| |
| {{!}}valign="top" style="padding-right: 10px; padding-bottom: 10px;"{{!}} [[Image:Flag_blue.png | 50px ]]
| |
| {{!}}valign="top" style="padding-right: 10px;"{{!}}
| |
| {{#if: {{{Pyungmoo| }}} | [[Pyungmoo]]:<br /> }}{{#if: {{{Bakra| }}} | [[Bakra]]:<br /> }}{{#if: {{{Imha| }}} | [[Imha]]:<br /> }}{{#if: {{{Daeyami| }}} | [[Daeyami]]: }}{{#if: {{{Colony| }}} | [[Colony]]: }}
| |
| {{!}}valign="top" style="padding-right: 10px;"{{!}}
| |
| {{#if: {{{Pyungmoo| }}} | {{{Pyungmoo}}}<br /> }}{{#if: {{{Bakra| }}} | {{{Bakra}}}<br /> }}{{#if: {{{Imha| }}} | {{{Imha}}}<br /> }}{{#if: {{{Daeyami| }}} | {{{Daeyami}}} }}{{#if: {{{Colony| }}} | {{{Colony}}} }}
| |
| {{!-}}
| |
| {{!}}valign="top" style="padding-right: 10px;padding-bottom: 10px;"{{!}} [[Image:Flag_red.png | 50px ]]
| |
| {{!}}valign="top" style="padding-right: 10px;"{{!}}
| |
| {{#if: {{{Yongan| }}} | [[Yongan]]:<br /> }}{{#if: {{{Yayang| }}} | [[Yayang]]:<br /> }}{{#if: {{{Jungrang| }}} | [[Jungrang]]:<br /> }}{{#if: {{{Miryang| }}} | [[Miryang]]: }}{{#if: {{{Colony| }}} | [[Colony]]: }}
| |
| {{!}}valign="top" style="padding-right: 10px;"{{!}}
| |
| {{#if: {{{Yongan| }}} | {{{Yongan}}}<br /> }}{{#if: {{{Yayang| }}} | {{{Yayang}}}<br /> }}{{#if: {{{Jungrang| }}} | {{{Jungrang}}}<br /> }}{{#if: {{{Miryang| }}} | {{{Miryang}}} }} }}{{#if: {{{Colony| }}} | {{{Colony}}} }}
| |
| {{#ifexpr: {{#if: {{{Mount Sohan| }}} | 1 | 0 }}
| |
| or {{#if: {{{Demon Tower| }}} | 1 | 0 }}
| |
| or {{#if: {{{Doyyumhwan| }}} | 1 | 0 }}
| |
| or {{#if: {{{Hasun Dong| }}} | 1 | 0 }}
| |
| or {{#if: {{{Hwang Temple| }}} | 1 | 0 }}
| |
| or {{#if: {{{Jungsun Dong| }}} | 1 | 0 }}
| |
| or {{#if: {{{Kuahlo Dong| }}} | 1 | 0 }}
| |
| or {{#if: {{{Land of Giants| }}} | 1 | 0 }}
| |
| or {{#if: {{{Lungsam| }}} | 1 | 0 }}
| |
| or {{#if: {{{Red Forest| }}} | 1 | 0 }}
| |
| or {{#if: {{{Sangsun Dong| }}} | 1 | 0 }}
| |
| or {{#if: {{{Snakefield| }}} | 1 | 0 }}
| |
| or {{#if: {{{Spider Dungeon 2| }}} | 1 | 0 }}
| |
| or {{#if: {{{Valley of Seungryong| }}} | 1 | 0 }}
| |
| or {{#if: {{{Yongbi Desert| }}} | 1 | 0 }}
| |
| or {{#if: {{{Grotto of Exile| }}} | 1 | 0 }}
| |
| or {{#if: {{{Devil's Catacomb| }}} | 1 | 0 }}
| |
| or {{#if: {{{Spider Dungeon 3| }}} | 1 | 0 }}
| |
| or {{#if: {{{Grotto of Exile V2| }}} | 1 | 0 }}
| |
| or {{#if: {{{Dragon's Temple| }}} | 1 | 0 }}
| |
| or {{#if: {{{Cape Dragon Fire| }}} | 1 | 0 }}
| |
| or {{#if: {{{Nephrite Bay| }}} | 1 | 0 }}
| |
| or {{#if: {{{Thunder Mountains| }}} | 1 | 0 }}
| |
| or {{#if: {{{Gautama Cliff| }}} | 1 | 0 }}
| |
| or {{#if: {{{Red Dragon Fortress| }}} | 1 | 0 }}
| |
| or {{#if: {{{Nemere's Watchtower| }}} | 1 | 0 }}
| |
| or {{#if: {{{Temple of the Ochao| }}} | 1 | 0 }}
| |
| or {{#if: {{{Enchanted Forest| }}} | 1 | 0 }}
| |
| or {{#if: {{{Meley's Lair| }}} | 1 | 0 }}
| |
| or {{#if: {{{Zodiac Temple| }}} | 1 | 0 }}
| |
| or {{#if: {{{Harbour| }}} | 1 | 0 }}
| |
| or {{#if: {{{Abandoned Fortress| }}} | 1 | 0 }}
| |
| or {{#if: {{{Dong Gwang Plain| }}} | 1 | 0 }}
| |
| or {{#if: {{{Seo Gwang Wastelands| }}} | 1 | 0 }}
| |
| or {{#if: {{{Nam Gwang Chasm| }}} | 1 | 0 }}
| |
| or {{#if: {{{Mysterious Dungeon| }}} | 1 | 0 }}
| |
| or {{#if: {{{Yilad Pass| }}} | 1 | 0 }}
| |
| or {{#if: {{{Northwind Canyon| }}} | 1 | 0 }}
| |
| or {{#if: {{{Soul Gorge| }}} | 1 | 0 }}
| |
| or {{#if: {{{Northwind Shelter| }}} | 1 | 0 }}
| |
| or {{#if: {{{Northwind Descent| }}} | 1 | 0 }}
| |
| or {{#if: {{{Serpent Temple| }}} | 1 | 0 }}
| |
| or {{#if: {{{Sung Mahi Tower| }}} | 1 | 0 }}
| |
| or {{#if: {{{Northwind Deeps| }}} | 1 | 0 }}
| |
| or {{#if: {{{Ship Defence| }}} | 1 | 0 }}
| |
| or {{#if: {{{Plateau of Illusions| }}} | 1 | 0 }}
| |
| or {{#if: {{{Otherworld| }}} | 1 | 0 }}
| |
| or {{#if: {{{Bazaar| }}} | 1 | 0 }}
| |
| or {{#if: {{{Wedding Map| }}} | 1 | 0 }}
| |
|
| |
|
| |
| | <!-- Quest name and level of the quest in chronological order --> |
| {{!-}}
| | |Quests = |
| {{!}}valign="top" style="padding-right: 10px; padding-bottom: 10px;"{{!}} [[Image:Flag_neutral.png | 50px ]]
| | *''Level 110'' World of Illusions |
| {{!}}valign="top" style="padding-right: 10px;"{{!}}
| |
| {{#if: {{{Mount Sohan| }}} | [[Mount Sohan]]:<br /> }}{{#if: {{{Demon Tower| }}} | [[Demon Tower]]:<br /> }}{{#if: {{{Doyyumhwan| }}} | [[Doyyumhwan]]:<br /> }}{{#if: {{{Hasun Dong| }}} | [[Hasun Dong]]:<br /> }}{{#if: {{{Hwang Temple| }}} | [[Hwang Temple]]:<br /> }}{{#if: {{{Jungsun Dong| }}} | [[Jungsun Dong]]:<br /> }}{{#if: {{{Kuahlo Dong| }}} | [[Kuahlo Dong]]:<br /> }}{{#if: {{{Valley of Giants| }}} | [[Valley of Giants]]:<br /> }}{{#if: {{{Lungsam| }}} | [[Lungsam]]:<br /> }}{{#if: {{{Red Forest| }}} | [[Red Forest]]:<br /> }}{{#if: {{{Sangsun Dong| }}} | [[Sangsun Dong]]:<br /> }}{{#if: {{{Snakefield| }}} | [[Snakefield]]:<br /> }}{{#if: {{{Spider Dungeon 2| }}} | [[Spider Dungeon 2]]:<br /> }}{{#if: {{{Valley of Seungryong| }}} | [[Valley of Seungryong]]:<br /> }}{{#if: {{{Yongbi Desert| }}} | [[Yongbi Desert]]:<br /> }}{{#if: {{{Grotto of Exile| }}} | [[Grotto of Exile]]:<br /> }}{{#if: {{{Devil's Catacomb| }}} | [[Devil's Catacomb]]:<br /> }}{{#if: {{{Spider Dungeon 3| }}} | [[Spider Dungeon 3]]:<br /> }}{{#if: {{{Grotto of Exile V2| }}} | [[Grotto of Exile V2]]:<br /> }}{{#if: {{{Dragon's Temple| }}} | [[Dragon's Temple]]:<br /> }}{{#if: {{{Cape Dragon Fire| }}} | [[Cape Dragon Fire]]:<br /> }}{{#if: {{{Nephrite Bay| }}} | [[Nephrite Bay]]:<br /> }}{{#if: {{{Thunder Mountains| }}} | [[Thunder Mountains]]:<br /> }}{{#if: {{{Gautama Cliff| }}} | [[Gautama Cliff]]:<br /> }}{{#if: {{{Red Dragon Fortress| }}} | [[Red Dragon Fortress]]:<br /> }}{{#if: {{{Nemere's Watchtower| }}} | [[Nemere's Watchtower]]:<br /> }}{{#if: {{{Temple of the Ochao| }}} | [[Temple of the Ochao]]:<br /> }}{{#if: {{{Enchanted Forest| }}} | [[Enchanted Forest]]:<br /> }}{{#if: {{{Meley's Lair| }}} | [[Meley's Lair]]:<br /> }}{{#if: {{{Zodiac Temple| }}} | [[Zodiac Temple]]:<br /> }}{{#if: {{{Harbour| }}} | [[Harbour]]:<br /> }}{{#if: {{{Abandoned Fortress| }}} | [[Abandoned Fortress]]:<br /> }}{{#if: {{{Dong Gwang Plain| }}} | [[Dong Gwang Plain]]:<br /> }}{{#if: {{{Seo Gwang Wastelands| }}} | [[Seo Gwang Wastelands]]:<br /> }}{{#if: {{{Nam Gwang Chasm| }}} | [[Nam Gwang Chasm]]:<br /> }}{{#if: {{{Mysterious Dungeon| }}} | [[Mysterious Dungeon]]:<br /> }}{{#if: {{{Yilad Pass| }}} | [[Yilad Pass]]:<br /> }}{{#if: {{{Northwind Canyon| }}} | [[Northwind Canyon]]:<br /> }}{{#if: {{{Soul Gorge| }}} | [[Soul Gorge]]:<br /> }}{{#if: {{{Northwind Shelter| }}} | [[Northwind Shelter]]:<br /> }}{{#if: {{{Northwind Descent| }}} | [[Northwind Descent]]:<br /> }}{{#if: {{{Serpent Temple| }}} | [[Serpent Temple]]:<br /> }}{{#if: {{{Sung Mahi Tower| }}} | [[Sung Mahi Tower]]:<br /> }}{{#if: {{{Northwind Deeps| }}} | [[Northwind Deeps]]:<br /> }}{{#if: {{{Ship Defence| }}} | [[Ship Defence]]:<br /> }}{{#if: {{{Plateau of Illusions| }}} | [[Plateau of Illusions]]:<br /> }}{{#if: {{{Otherworld| }}} | [[Otherworld]]:<br /> }}{{#if: {{{Bazaar| }}} | [[Bazaar]]:<br /> }}{{#if: {{{Wedding Map| }}} | [[Wedding Map]]:<br /> }}
| |
| {{!}}valign="top" style="padding-right: 10px;"{{!}}
| |
| {{#if: {{{Mount Sohan| }}} | {{{Mount Sohan}}}<br /> }}{{#if: {{{Demon Tower| }}} | {{{Demon Tower}}}<br /> }}{{#if: {{{Doyyumhwan| }}} | {{{Doyyumhwan}}}<br /> }}{{#if: {{{Hasun Dong| }}} | {{{Hasun Dong}}}<br /> }}{{#if: {{{Hwang Temple| }}} | {{{Hwang Temple}}}<br /> }}{{#if: {{{Jungsun Dong| }}} | {{{Jungsun Dong}}}<br /> }}{{#if: {{{Kuahlo Dong| }}} | {{{Kuahlo Dong}}}<br /> }}{{#if: {{{Valley of Giants| }}} | {{{Valley of Giants}}}<br /> }}{{#if: {{{Lungsam| }}} | {{{Lungsam}}}<br /> }}{{#if: {{{Red Forest| }}} | {{{Red Forest}}}<br /> }}{{#if: {{{Sangsun Dong| }}} | {{{Sangsun Dong}}}<br /> }}{{#if: {{{Snakefield| }}} | {{{Snakefield}}}<br /> }}{{#if: {{{Spider Dungeon 2| }}} | {{{Spider Dungeon 2}}}<br /> }}{{#if: {{{Valley of Seungryong| }}} | {{{Valley of Seungryong}}}<br /> }}{{#if: {{{Yongbi Desert| }}} | {{{Yongbi Desert}}}<br /> }}{{#if: {{{Grotto of Exile| }}} | {{{Grotto of Exile}}}<br /> }}{{#if: {{{Devil's Catacomb| }}} | {{{Devil's Catacomb}}}<br /> }}{{#if: {{{Spider Dungeon 3| }}} | {{{Spider Dungeon 3}}}<br /> }}{{#if: {{{Grotto of Exile V2| }}} | {{{Grotto of Exile V2}}}<br /> }}{{#if: {{{Dragon's Temple| }}} | {{{Dragon's Temple}}}<br /> }}{{#if: {{{Cape Dragon Fire| }}} | {{{Cape Dragon Fire}}}<br /> }}{{#if: {{{Nephrite Bay| }}} | {{{Nephrite Bay}}}<br /> }}{{#if: {{{Thunder Mountains| }}} | {{{Thunder Mountains}}}<br /> }}{{#if: {{{Gautama Cliff| }}} | {{{Gautama Cliff}}}<br /> }}{{#if: {{{Red Dragon Fortress| }}} | {{{Red Dragon Fortress}}}<br /> }}{{#if: {{{Nemere's Watchtower| }}} | {{{Nemere's Watchtower}}}<br /> }}{{#if: {{{Temple of the Ochao| }}} | {{{Temple of the Ochao}}}<br /> }}{{#if: {{{Enchanted Forest| }}} | {{{Enchanted Forest}}}<br /> }}{{#if: {{{Meley's Lair| }}} | {{{Meley's Lair}}}<br /> }}{{#if: {{{Zodiac Temple| }}} | {{{Zodiac Temple}}}<br /> }}{{#if: {{{Harbour| }}} | {{{Harbour}}}<br /> }}{{#if: {{{Abandoned Fortress| }}} | {{{Abandoned Fortress}}}<br /> }}{{#if: {{{Dong Gwang Plain| }}} | {{{Dong Gwang Plain}}}<br /> }}{{#if: {{{Seo Gwang Wastelands| }}} | {{{Seo Gwang Wastelands}}}<br /> }}{{#if: {{{Nam Gwang Chasm| }}} | {{{Nam Gwang Chasm}}}<br /> }}{{#if: {{{Mysterious Dungeon| }}} | {{{Mysterious Dungeon}}}<br /> }}{{#if: {{{Yilad Pass| }}} | {{{Yilad Pass}}}<br /> }}{{#if: {{{Northwind Canyon| }}} | {{{Northwind Canyon}}}<br /> }}{{#if: {{{Soul Gorge| }}} | {{{Soul Gorge}}}<br /> }}{{#if: {{{Northwind Shelter| }}} | {{{Northwind Shelter}}}<br /> }}{{#if: {{{Northwind Descent| }}} | {{{Northwind Descent}}}<br /> }}{{#if: {{{Serpent Temple| }}} | {{{Serpent Temple}}}<br /> }}{{#if: {{{Sung Mahi Tower| }}} | {{{Sung Mahi Tower}}}<br /> }}{{#if: {{{Northwind Deeps| }}} | {{{Northwind Deeps}}}<br /> }}{{#if: {{{Ship Defence| }}} | {{{Ship Defence}}}<br /> }}{{#if: {{{Plateau of Illusions| }}} | {{{Plateau of Illusions}}}<br /> }}{{#if: {{{Otherworld| }}} | {{{Otherworld}}}<br /> }}{{#if: {{{Bazaar| }}} | {{{Bazaar}}}<br /> }}{{#if: {{{Wedding Map| }}} | {{{Wedding Map}}}<br /> }} }}
| |
| {{!}}} }}
| |
| </div>
| |
| {{#if:{{{Function}}} | <div align="center" style="padding-top: 15px;">
| |
| <div align="center" style="width: 150px; border: 1px solid #35215f; border-top-left-radius: 10px; border-top-right-radius: 10px; border-bottom-left-radius: 10px; border-bottom-right-radius: 10px; box-shadow:2px 2px 5px #000000; background: #35215f; color: #dadada; font-weight: bold; padding: 5px;">Function</div>
| |
| </div>
| |
| <div style="padding-left: 20px; padding-top: 10px;">{{{Function}}}</div>
| |
| | }}
| |
| </td>
| |
| </tr>
| |
| <tr>
| |
| <td colspan="2">
| |
| <table width="100%" style="padding: 0px; border-spacing: 0px;">
| |
| <tr>
| |
| <td valign="top" width="50%" style="padding-left: 20px; padding-top: 15px;">
| |
| <div align="center" style="width: 150px; border: 1px solid #35215f; border-top-left-radius: 10px; border-top-right-radius: 10px; border-bottom-left-radius: 10px; border-bottom-right-radius: 10px; box-shadow:2px 2px 5px #000000; background: #35215f; color: #dadada; font-weight: bold; padding: 5px;">Quests</div>
| |
| </td>
| |
| <td valign="top" align="left" width="50%" style="padding-top: 15px;">
| |
| <div align="center" style="width: 200px; border: 1px solid #35215f; border-top-left-radius: 10px; border-top-right-radius: 10px; border-bottom-left-radius: 10px; border-bottom-right-radius: 10px; box-shadow:2px 2px 5px #000000; background: #35215f; color: #dadada; font-weight: bold; padding: 5px;">Additional Information</div>
| |
| </td>
| |
| </tr>
| |
| <tr>
| |
| <td valign="top" style="padding: 5px;">
| |
| <div style="padding: 5px; border: 1px dashed #88283a;">{{#if:{{{Quests}}} | {{{Quests}}} | <i>This NPC is not needed for any quests</i> }}</div>
| |
| </td>
| |
| <td valign="top" style="padding: 5px;">
| |
| <div style="padding: 5px; border: 1px dashed #88283a;">{{#if:{{{Other}}} | {{{Other}}} | <i>No other information available</i> }}</div>
| |
| </td>
| |
| </tr>
| |
| </table>
| |
| </td>
| |
| </tr>
| |
| </table>
| |
|
| |
|
| {{#if: {{{Class| }}} | <includeonly>[[Category:NPC/{{{Class}}}|{{PAGENAME}}]]</includeonly> }}
| | <!-- Other information --> |
| {{#ifeq: {{PAGENAME}} | NPC || <includeonly>[[Category:NPC|{{PAGENAME}}]]</includeonly> }}
| | |Other = |
|
| |
|
| <noinclude> | | <!-- Insert |{original map name (see mainpage)} and coordinates --> |
| [[Category:Templates|{{PAGENAME}}]]
| | |Joan = 688, 748 |
| [[Category:Templates/Layout|{{PAGENAME}}]]
| | |Pyungmoo = 342, 800 |
| </noinclude>
| | |Yongan = 540, 500 |
| | |Cape Dragon Fire = 530, 1256 |
|
| |
|
| {{Subpage|[[Main Page|Metin2Wiki]]|[[:Category:NPC|NPC-Overview]]}}
| | }} |